Tag: mcp

  • Top MCP Servers for High-Performance Agentic Development 2026

    Top MCP Servers for High-Performance Agentic Development 2026

    I watched an engineer lose the better part of a day to a “top MCP servers” listicle. He wired his agent to a standalone Postgres server and a Puppeteer server that a year-old post had ranked highly, spent an afternoon debugging why neither behaved, and eventually found the answer in both repositories’ READMEs: archived. Not broken — abandoned. The list he trusted was pointing at gravestones.

    That’s the state of the MCP ecosystem in 2026. The protocol won so completely that the server landscape exploded past ten thousand entries, and a large fraction of any “best of” list is now noise, stale, or dead. So this is not a star-count leaderboard. These are five servers chosen for one thing only: what they change about an agent’s actual capability — plus a sixth section for the data-engineering stack the general-purpose lists always skip. Every one of them is live and maintained as of writing, which, as that lost afternoon shows, is the specification that matters most.

    Add servers by leverage, not by star count — and start with the one that fixes errors before they’re written.

    TL;DR

    • → The five worth wiring in: GitHub (move code), Playwright (drive the browser), Context7 (inject current docs), Serena (edit code precisely), and the official reference servers (filesystem, git, fetch, memory, reasoning).
    • → Context7 is the highest-leverage addition to any code-generating agent because it kills hallucinated and deprecated APIs at write-time instead of catching them after.
    • → Star count is a vanity metric — the only durable selection criterion is whether a server is still actively maintained, since the ecosystem has archived several once-popular repos.
    • → The official reference servers are maintained as educational building blocks, not hardened production infrastructure — treat them accordingly.
    • → Every server you add re-sends its tool schemas into the model’s context on each turn, so more servers is not a better agent — fewer, sharper servers wins on both cost and accuracy.
    • → For data work, extend the general stack with the dbt MCP server and a database server so the agent reaches governed, structured assets rather than raw tables.
    • → MCP is now stewarded by the Linux Foundation’s Agentic AI Foundation, so the protocol itself is stable infrastructure — the churn is all at the server layer.

    How MCP stopped being an Anthropic project

    A little context explains why the server layer is such a mess. Anthropic open-sourced the Model Context Protocol in late 2024 as a universal way to connect models to tools and data — the fix for the N×M problem where every agent needed bespoke glue for every integration. Through 2025 the other major labs adopted it, and in December 2025 Anthropic donated MCP to the Linux Foundation’s new Agentic AI Foundation, co-founded with Block and OpenAI. By early 2026 the protocol had crossed roughly 97 million monthly downloads and more than ten thousand active servers. It became, in the phrase everyone reaches for, the USB-C of agent tooling.

    The good news is that the protocol is now neutral, stable infrastructure. The bad news is that “ten thousand servers” is mostly a graveyard with a few landmarks, and the landmarks move. An agent is only as capable as the hands you give it — the same lesson from building a Databricks AI agent whose tools are the functions it can actually call — so choosing servers well is now a real engineering decision, not a shopping trip. Here’s how I’d choose.

    The five servers worth wiring in

    1. Context7 — write correct code the first time

    The most common failure in AI coding isn’t bad logic; it’s a confidently hallucinated API — a method that was deprecated two versions ago, or never existed. Context7, from Upstash, attacks that directly by pulling up-to-date, version-specific library documentation straight into the agent’s context at the moment it’s writing code. For any agent working against fast-moving libraries, this is the single highest-leverage server on the list, because it prevents errors rather than catching them downstream. If you add one server to a code-generating agent, add this one.

    2. GitHub — turn a code reasoner into a code mover

    The official GitHub MCP server is the backbone of any agent that touches a real development workflow. It exposes repositories, issues, pull requests, Actions, and code-security surfaces through natural language, and because GitHub maintains it themselves, it tracks the platform instead of lagging behind it. This is the difference between an agent that can talk about your code and one that can open a pull request, triage an issue, or check a failing workflow. It’s the one most teams reach for first, and for good reason.

    3. Serena — give the agent an IDE’s understanding, not a text editor’s

    Search-and-replace is a crude, expensive way for an agent to edit code: it burns tokens dumping whole files into context and makes mistakes pattern-matching on strings. Serena, from Oraios, gives the agent symbol-level understanding of a codebase through the Language Server Protocol, across dozens of languages. The agent can jump to the actual function or symbol and change exactly that, which on a large codebase is the difference between a precise edit and a slow, token-hungry guess. Think IDE, not Notepad.

    4. Playwright — drive the browser without a vision model

    Browser automation is where a lot of agents fall apart, usually because they’re squinting at screenshots and guessing pixel coordinates. Microsoft’s Playwright MCP sidesteps that entirely by driving the browser through its accessibility tree — structured, deterministic data about the page instead of an image to interpret. No vision model in the loop means faster, cheaper, more reliable web interaction, whether the agent is testing a web app, completing a flow, or scraping a rendered page.

    5. The official reference servers — the local plumbing

    Rounding out a serious setup, the official reference collection ships the dependable primitives: Filesystem for local file access, Git, Fetch for pulling web content, Memory for persistence across turns, and Sequential Thinking, which gives the agent a structured space to reason step by step before acting. Two honest caveats, though. These are maintained as educational references, not hardened production infrastructure — solid building blocks you should wrap and harden yourself. And the project has archived several once-popular servers, including the standalone Postgres and Puppeteer ones, which is precisely why so many older lists now point at dead repositories. Confirm a server is live before you build on it.

    The data engineer’s addendum

    Those five are the general agentic-dev backbone, tuned for people shipping application code. If your agent works on data, the stack looks a little different, and the general lists never mention it. Two additions matter.

    First, the dbt MCP server, which dbt Labs open-sourced to give agents governed access to your dbt assets — models, metrics, lineage — instead of letting them hallucinate table names. If you already run dbt, that’s a ready-made server that plugs straight into the patterns from the native dbt integration guide, and it pairs naturally with the everyday operations in the dbt commands reference. Second, a database server scoped to read-only queries, so the agent can inspect real schemas and results rather than guess. The same instinct that makes you expose narrow, safe operations in a Streams-and-Tasks pipeline applies here: give the agent sharp, governed tools, not a firehose.

    Wiring a server in is usually just a few lines of client config. Adding the two highest-leverage ones looks roughly like this:

    {
      "mcpServers": {
        "context7": {
          "command": "npx",
          "args": ["-y", "@upstash/context7-mcp"]
        },
        "github": {
          "command": "npx",
          "args": ["-y", "@modelcontextprotocol/server-github"],
          "env": { "GITHUB_TOKEN": "your-scoped-token" }
        }
      }
    }

    Performance: fewer servers, sharper tools

    “High-performance” is doing quiet work in the phrase “high-performance agentic development,” and it’s not about which server is fastest. It’s about restraint. Every server you connect advertises its tools to the model, and those tool schemas are re-sent into the context window on essentially every turn. Bolt on five servers exposing forty tools each and you’ve handed the model two hundred tool definitions to read and choose among before it even sees the task. That costs tokens on every call, and — just as damaging — it degrades tool selection, because the model now has to discriminate among two hundred near-neighbors.

    The discipline is to connect only the servers a given agent actually needs, and to prefer servers with a few sharp tools over ones with sprawling surface area. This pressure is real enough that Anthropic shipped Tool Search and Programmatic Tool Calling in its API specifically to help agents handle large tool counts without drowning in schemas. But the cheapest optimization is still the one you make by not adding a server you don’t need. Governance and curation, not accumulation, are where the performance comes from — the same shift toward standardized, well-defined interfaces that motivates efforts like the Open Semantic Interchange.

    The gotchas nobody warns you about

    Star count is a trap; maintenance is the real metric. A repo with fifty thousand stars that hasn’t merged a commit in six months is a liability, not an asset. Before you wire in any server, check the last commit date and the open-issue response time. Archived-but-popular is the single most common way agent setups break.

    Every server taxes the context window. There’s no such thing as a free tool. Adding a server you use once a month means paying for its schemas on every single call in between. Connect deliberately, and disconnect servers an agent doesn’t use.

    Reference servers are not production infrastructure. The official filesystem, git, and fetch servers are excellent building blocks and explicitly educational. In production, wrap them with your own permission scoping, logging, and error handling rather than exposing them raw.

    Every server is an attack surface. Tool results flow back into the model’s context, which makes them a prompt-injection vector; a filesystem server with broad access is a data-exfiltration risk. The security community has already catalogued dozens of attack techniques aimed specifically at tool-using agents. Scope permissions tightly, prefer read-only where you can, and don’t run a server you haven’t vetted.

    Know whether you’re running local or remote. A local (stdio) server the client launches as a subprocess has a very different trust and auth model from a remote server reachable over a URL. Remote servers need real authentication; local ones need real filesystem discipline. Don’t blur the two.

    The one principle: add hands, not stars

    A server earns its place by changing what your agent can do — not by how many stars it has, and only if it’s still alive. The protocol already did the hard part: it made every compliant tool plug into every compliant agent, and put the standard under neutral governance so it won’t shift under you. What’s left is a curation problem wearing a shopping problem’s clothes. Give your agent the smallest set of sharp, maintained servers that cover what it actually needs to do — write correct code, move it, edit it precisely, reach the browser, touch the filesystem, query your governed data — and stop there. The best agent stack isn’t the longest one. It’s the one where every server is still being maintained and every tool earns its seat in the context window.

    Related reading: Build a Databricks AI Agent with GPT-5 · Snowflake Native dbt Integration · dbt Commands Cheat Sheet · Snowflake Interview Questions 2026 · Official MCP reference servers · MCP joins the Agentic AI Foundation

  • Build a Simple MCP Server in Python with FastMCP (2026)

    Build a Simple MCP Server in Python with FastMCP (2026)

    A colleague pinged me last spring, quietly furious. He’d spent three days building an MCP server to give an internal agent access to the team’s Snowflake warehouse. The protocol part worked on day one. What ate the other two and a half days was everything the tutorials skip: the agent kept picking the wrong tool, the responses ballooned the token bill, and a stray print() statement silently corrupted every message the server sent. The server was “done” in ten lines. It was useful about a week later.

    That gap — between a server that runs and a server that actually helps a model do its job — is the entire subject of this article. The Model Context Protocol has become the default way to plug LLMs into real systems, and building a basic server in Python is genuinely a ten-minute job. But the ten-minute version is a trap if you think you’re finished when it starts. The protocol is the easy part. Tool design is the hard part, and nobody warns you.

    A five-step flowchart labeled How a Tool Call Flows, showing steps: Discover, Request, Execute, Return, and Use, with arrows connecting each. Client and server sides are indicated by color.

    Every MCP interaction is this loop: discover, call, execute, return, use — the model never touches your Python directly.

    TL;DR

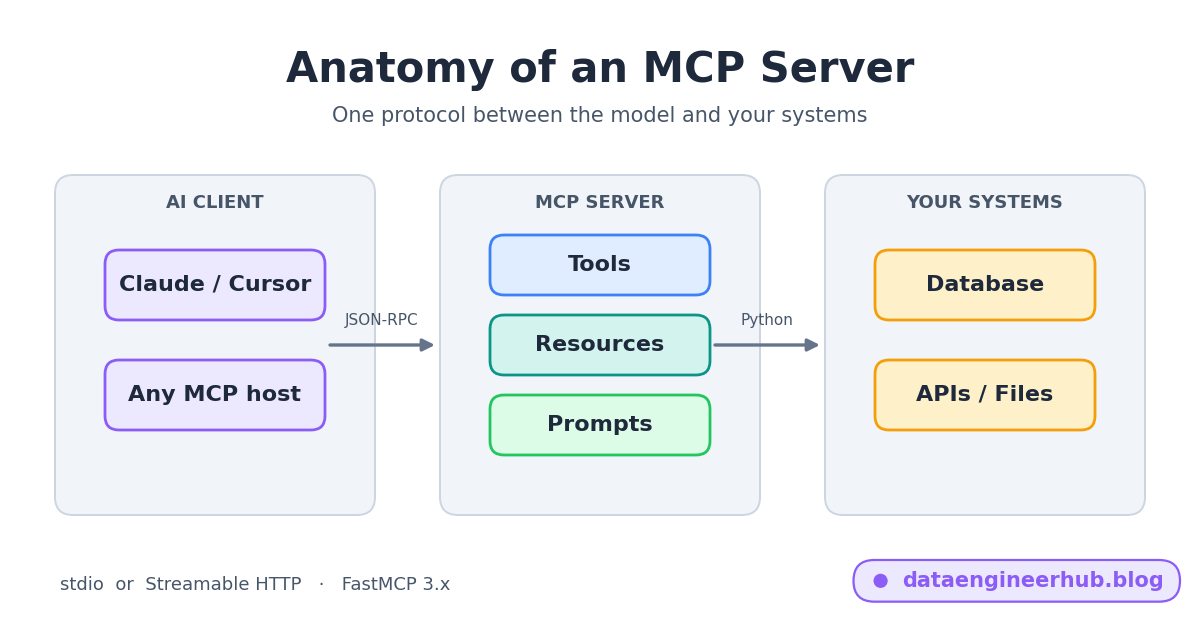
    • → An MCP server is a passive provider: it advertises tools, resources, and prompts, then waits for an AI client to call them over JSON-RPC. Your code never calls the model.
    • → With FastMCP (version 3.4.0 as of June 2026, Python 3.10+), a working server is a decorated Python function plus mcp.run() — roughly ten lines.
    • → There are exactly two standard transports: stdio for local servers the client launches as a subprocess, and Streamable HTTP for remote servers reachable over a URL.
    • → A tool’s docstring and type hints are its prompt — the model chooses tools from that text, so vague descriptions cause wrong-tool selection more often than bad logic does.
    • → Every tool schema is re-sent to the model on effectively every turn, so dumping forty tools into one server quietly inflates token cost and degrades tool selection.
    • → For stdio servers, writing anything that isn’t a valid MCP message to stdout corrupts the stream — the single most common “it worked yesterday” bug.
    • → Remote servers on Streamable HTTP need real auth; the 2025-06-18 spec standardized OAuth 2.1 for exactly this, and it is the part that turns a demo into a project.

    What an MCP server actually is

    Strip away the acronym and the mental model is simple: an MCP server is a small program that exposes capabilities in a shape an AI model understands, and then sits still. It does not orchestrate anything. It does not call the LLM. It answers a discovery request (“what can you do?”) and then runs whatever the client asks it to run. If you’ve read my walkthrough of building a Databricks AI agent where tools are just Python functions the LLM decides to call, MCP is that same idea lifted into an open standard so any client can use your tools without a custom integration.

    The protocol defines three primitives. Tools are actions the model can invoke — run a query, send a message, create a ticket. Resources are read-only data the model can pull in for context — a file, a schema, a config. Prompts are reusable templates a user can trigger. Messages travel as JSON-RPC 2.0. The current protocol revision is 2025-06-18, and it is worth pinning that number because the transport story changed underneath it — more on that below.

    Here’s the versioning landmine, since half the tutorials online get it wrong: FastMCP and “the MCP Python SDK” are related but not identical. FastMCP 1.0 was folded into the official SDK back in 2024, and then the standalone project kept going on its own track. Today the standalone FastMCP on PyPI is at 3.4.0, while blog posts still confidently reference “2.x” or a mythical “3.0 rewrite” as if that’s current. When you read example code, check which one it’s for — the decorator API differs in small, breaking ways between versions.

    The ten-line server

    Install it with FastMCP (uv is the fast path, plain pip works fine):

    uv pip install fastmcp
    # or: pip install fastmcp
    The canonical first server is an addition tool. This is genuinely the whole file:
    
    from fastmcp import FastMCP
    
    mcp = FastMCP("Demo")
    
    @mcp.tool
    def add(a: int, b: int) -> int:
        """Add two integers and return the sum."""
        return a + b
    
    if __name__ == "__main__":
        mcp.run()          # stdio transport by default

    Notice what you did not write: no JSON-RPC handlers, no schema definitions, no transport plumbing. FastMCP reads your type hints to build the tool’s input schema and your docstring to describe it to the model. That’s the whole pitch of the framework, and it’s why it powers the large majority of MCP servers in the wild.

    To try it before wiring it into a client, run the dev inspector, which launches a local UI that shows the raw JSON-RPC traffic:

    fastmcp dev server.py

    Call the tool from the inspector and you’ll see something like this — the request the client sends, and the structured result your function returned:

     tools/call  add  {"a": 2, "b": 3}
    
      result:
        content: [{ "type": "text", "text": "5" }]
        isError: false
    
      ✓ 1 tool available   ·   transport: stdio   ·   0.4 ms

    That’s it. You have a real, spec-compliant MCP server. Now let’s make one worth shipping.

    From toy to useful: a data tool

    An addition tool proves the wiring. A data engineer wants the model to answer questions against real tables — safely. The realistic pattern is a small, sharp toolset: one tool to inspect structure, one to run a constrained query, and a resource for the schema so the model has context before it writes any SQL. Here it is against a local SQLite database so it actually runs:

    import sqlite3
    from fastmcp import FastMCP
    
    mcp = FastMCP("Warehouse")
    DB = "analytics.db"
    
    @mcp.resource("schema://tables")
    def list_tables() -> str:
        """List every table name in the warehouse."""
        con = sqlite3.connect(DB)
        rows = con.execute(
            "SELECT name FROM sqlite_master WHERE type='table'"
        ).fetchall()
        con.close()
        return "\n".join(r[0] for r in rows)
    
    @mcp.tool
    def run_query(sql: str) -> list[dict]:
        """Run a read-only SELECT and return rows as a list of dicts.
        Only SELECT statements are permitted; anything else is rejected."""
        if not sql.strip().lower().startswith("select"):
            raise ValueError("Only SELECT queries are allowed.")
        con = sqlite3.connect(DB)
        con.row_factory = sqlite3.Row
        rows = [dict(r) for r in con.execute(sql).fetchall()]
        con.close()
        return rows
    
    if __name__ == "__main__":
        mcp.run()

    Two design choices are doing real work here. The run_query docstring explicitly states the guardrail (“Only SELECT statements are permitted”) because the model reads that line and will lean on it. And the schema lives in a resource, not a tool, because it’s context the model should be able to pull in cheaply rather than an action it has to spend a tool call on. That distinction is the difference between an agent that guesses column names and one that doesn’t.

    This is also exactly where the ecosystem is converging in the data world. dbt Labs shipped an open-source dbt MCP server so agents can query governed dbt assets instead of hallucinating them — if you already run dbt, that’s a ready-made server before you write a line, and it slots neatly next to the patterns in my Snowflake native dbt integration guide and the everyday commands in the dbt commands cheat sheet. The same logic applies to pipeline operations: the primitives you built in the Streams and Tasks pipeline guide or an OpenFlow ingestion flow are all candidates to expose as narrow, well-named tools.

    stdio or Streamable HTTP: pick deliberately

    MCP defines two standard transports, and choosing between them is mostly a question of where the server lives.

    stdio — local, subprocess

    The client launches your server as a child process and talks to it over standard input and output. This is what powers desktop integrations: the client owns the process, so there’s no network and no per-connection auth to speak of. It’s the default for mcp.run() and the right choice for anything that runs on the same machine as the client.

    Streamable HTTP — remote, multi-client

    Here the server is an independent process exposing a single HTTP endpoint (conventionally /mcp) that handles many clients at once, optionally streaming responses via Server-Sent Events. This replaced the older HTTP+SSE transport from the 2024-11-05 spec — if you find a tutorial wiring up a separate /sse endpoint, it’s aimed at the deprecated design. You switch transports through FastMCP’s run configuration (the exact argument is version-specific, so confirm it against the current docs rather than trusting a copied snippet):

    if __name__ == "__main__":
        mcp.run(transport="http", host="127.0.0.1", port=8000)

    The moment you go remote, authentication stops being optional. The 2025-06-18 revision standardized OAuth 2.1 for exactly this case, and it is — every practitioner I’ve compared notes with agrees — the least fun part of the whole exercise. A universal protocol only helps if access to it is governed, which is the same argument behind industry standards efforts like the Open Semantic Interchange: agreeing on the interface is step one; controlling who gets through it is the real work.

    The cost math nobody does upfront

    Here’s the number that surprises people. Every tool your server exposes carries a schema — name, description, parameter types — and that schema is sent to the model as part of its context on essentially every turn where the tool is available. Tools aren’t free at rest; they’re a standing tax on your context window.

    Say each tool’s schema and docstring run about 200 tokens once you account for parameter descriptions. A tight server with 5 tools costs roughly 1,000 tokens of overhead per call. A kitchen-sink server with 40 tools costs about 8,000 tokens per call before the model has read a single word of the user’s actual question. Across a 50-turn agent session, that’s the difference between ~50,000 and ~400,000 tokens spent purely on tool definitions — 350,000 wasted tokens per session, multiplied by every session, every day. There’s a documented case of a popular server pushing 43 tools into context and measurably degrading the agent’s performance before it did anything at all. The cost shows up twice: on your bill, and in worse tool selection, because the model now has to discriminate among forty near-identical options.

    The fix is boring and effective: fewer tools, sharper boundaries. One run_query beats ten single-purpose query wrappers.

    The gotchas nobody warns you about

    A single print() will corrupt a stdio server. On the stdio transport, stdout is the message channel and must contain only valid MCP messages. A debug print(), a stray library log, a warning banner — any of it injected into stdout garbles the JSON-RPC stream and the client fails in ways that look like anything but the real cause. Log to stderr or a file, never stdout.

    Your docstring is the model’s instruction manual, so treat it like one. The model selects tools by reading their descriptions. “Runs a query” and “Run a read-only SELECT against the analytics warehouse; rejects writes” produce measurably different behavior from the same underlying function. Vague docstrings are a correctness bug, not a style nit.

    Blocking I/O stalls everything. A synchronous tool that makes a slow network or database call blocks the server’s event loop and freezes concurrent requests. For anything that waits on I/O, write an async tool (async def) so the server stays responsive under more than one client.

    Return structured data, not stringified blobs. It’s tempting to json.dumps() everything into a text field. Let FastMCP serialize real Python objects — lists, dicts, dataclasses — so the model receives typed, parseable results instead of having to re-parse your string.

    “It works in the inspector” is not “it works in the client.” The dev inspector is forgiving. Real clients enforce protocol version negotiation and transport details more strictly. Test against the actual client you intend to ship into before calling it done.

    The one principle: design the tool, not the server

    An MCP server is a UX problem wearing a protocol costume — the user just happens to be a language model. FastMCP makes the protocol disappear in ten lines precisely so you can spend your effort on the thing that actually determines whether the server is good: which tools exist, what they’re named, how their descriptions read, and what they refuse to do. Get the protocol working in the first ten minutes, then spend the real time on the interface. The teams whose agents feel sharp aren’t the ones who implemented MCP most cleverly. They’re the ones who designed the smallest, clearest set of tools and wrote docstrings like they meant them.

    Related reading: Build a Databricks AI Agent with GPT-5 · Snowflake Native dbt Integration · dbt Commands Cheat Sheet · Snowflake Interview Questions 2026 · MCP specification (2025-06-18) · FastMCP docs · dbt Labs blog (dbt MCP server)

  • Model Context Protocol Explained in 3 Levels of Difficulty

    Model Context Protocol Explained in 3 Levels of Difficulty

    Every data platform team building agentic pipelines hits the same wall eventually. You want Claude or CoCo to query Snowflake, trigger a dbt run, check an Airflow DAG, and post the result to Slack — one agent, four systems. The naive path is to write four custom connectors. Then someone adds Cursor as a second AI client, and now you need eight connectors. Add a third client and a fifth tool, and you’re maintaining fifteen bespoke integrations, each with its own auth, its own schema, its own failure mode. This is the M×N problem, and it’s the entire reason the Model Context Protocol exists.

    MCP is an open standard — introduced by Anthropic in November 2024 and since handed to neutral, open governance — that turns M×N custom integrations into M+N standardized ones. Every AI client speaks one protocol; every tool exposes itself once through that protocol; any client can now reach any tool with zero custom glue. This article explains MCP the way you’d actually want to learn it: as a problem, then as an architecture, then as the production concerns that only show up once you’re running it for real.

    A flowchart shows 5 steps of an MCP request process, illustrating how data query and response occur between a host, client, server, and back for checking if last night’s load is complete.

    The same five-step shape whether the tool on the other end is Snowflake, dbt, Airflow, or Slack — that uniformity is the entire point of the protocol.

    TL;DR

    → The problem: M AI clients × N tools = M×N custom integrations. Every new client needs a connector to every tool; every new tool needs a connector to every client. This is the wall every multi-tool agent project hits.

    → The architecture: MCP standardizes on three roles — the Host (the AI model reasoning about what to do), the MCP Client (the protocol handler maintaining the connection), and MCP Servers (the tools, exposing capabilities through one shared interface). One protocol, many tools, loosely coupled.

    → The flow: a request comes in → the client sends a tool request over MCP → the server executes the action → the response comes back over MCP → the model gets its result. Five steps, always the same shape, regardless of which tool is on the other end.

    → In production: transport is stdio for local servers or Streamable HTTP for remote ones (what most people still call “SSE,” though the spec has since folded plain SSE into the newer Streamable HTTP transport). Security means authentication, explicit user consent for tool access, audit logging, and guarding against supply-chain risk from untrusted servers.

    → Deployment splits into local servers (full control, data never leaves the machine) and cloud servers (containers or serverless, elastic and shared) — and the choice affects both your security posture and your Snowflake credit bill.

    Level 1 — The problem: why M×N breaks down

    Picture three AI clients your team already uses: a chat assistant, an IDE copilot, and an agent framework running scheduled pipeline checks. Each one can only see what’s inside its own context window — the system prompt, conversation history, and whatever data you’ve explicitly fed it. None of them can natively reach Snowflake, dbt, Airflow, or your internal APIs. To fix that, each client needs its own custom adapter to each tool.

    That’s the M×N integration explosion. Three AI clients times five tools is fifteen custom connections, and every one of them is a maintenance burden: its own auth flow, its own error handling, its own schema mapping, its own breakage when the underlying API changes. Add a client and you add five more connections. Add a tool and you add three more. The graph of arrows gets tangled fast, and nobody owns the whole picture — which is exactly the kind of sprawl that turns into an unaudited security gap, the same failure mode we cover in governing agentic workflows.

    The formula is worth internalizing because it’s the whole justification for a standard protocol: M clients × N tools = M×N integrations. Three AI applications times five tools is fifteen integrations built and maintained by hand. MCP’s entire value proposition is collapsing that multiplication into addition.

    Level 2 — The architecture: Host, Client, Servers

    MCP introduces a standard protocol to connect AI models to tools, built on three roles.

    The Host is the AI model itself — Claude, CoCo, or whatever’s reasoning about the task. It understands the user’s request, decides when a tool is needed, and interprets the results that come back. The Host never talks to a tool directly.

    The MCP Client is the protocol handler sitting between the Host and the outside world. It maintains the connection to MCP servers, handles the messaging and routing, and translates between what the model wants and what the tool’s interface expects.

    The MCP Servers are the tools themselves, each exposing its capabilities through the same standardized interface — a Snowflake warehouse, a dbt project, an Airflow instance, a file system, a Slack channel. From the model’s perspective, querying Snowflake and posting to Slack look structurally identical: a tool request in, a tool response out.

    The request flow is always the same five steps: ① a user request or conversation reaches the Host, which decides a tool is needed; ② the Client sends a tool request over MCP; ③ the server executes the action or accesses the data; ④ the tool response comes back over MCP; ⑤ the results return to the model, which continues reasoning with them. This is the same pattern our MCP in Snowflake CoCo Desktop guide walks through concretely with a live warehouse connection.

    Three properties fall out of this design. One protocol, many tools — you write the integration once per tool, not once per client-tool pair. Loosely coupled and easy to extend — adding a sixth tool means standing up one more server, not touching any existing client. The model gets more context on demand — rather than stuffing every possible data source into the system prompt, the model requests exactly what it needs, when it needs it, which is the same context-discipline argument behind choosing tools over subagents for well-defined operations.

    Level 3 — Production: transport, security, deployment

    Understanding the architecture gets you a working demo. Running MCP in production surfaces three concerns the diagram doesn’t show.

    Transport — how it connects. Local servers use stdio: the client spawns the server as a subprocess and exchanges JSON-RPC messages over standard input and output. It’s simple, fast, and the default recommendation whenever the server and client run on the same machine. Remote servers use Streamable HTTP — what most documentation still calls “SSE” from the protocol’s earlier revision, since the original Server-Sent Events transport has since been superseded by Streamable HTTP, which adds session management and resumability on top of the same idea: the client posts JSON-RPC to an endpoint and receives responses as a stream. Streamable HTTP is what scales — it’s how you’d expose a Snowflake MCP server to multiple teams without spinning up a subprocess per user.

    Security — keeping it safe. MCP delegates enforcement to the host application, but the spec is explicit about the requirements. Authentication verifies both clients and servers before any tool call executes. User consent is required for tool access — a host must surface what’s about to happen and let a human approve it, not silently authorize an agent to act. Audit logs track every action and change, the same discipline behind our ETL audit logger approach applied to tool calls instead of pipeline tasks. And supply-chain risk is real: an MCP server is code you’re trusting to run with whatever privileges you grant it, so an untrusted or malicious server is a live attack surface — treat every third-party server the way you’d treat an unreviewed dependency, not a trusted extension of your own stack. Together these form what’s sometimes called the trusted tool boundary, and it’s the same boundary we cover in depth in giving agents safe access to pipeline metadata.

    Deployment — where it runs. Local servers run on your own machine: full control, data never leaves your environment, and the simplest security story because there’s no network boundary to defend. Cloud servers run in containers or serverless platforms: elastic, shareable across a team, and necessary once more than one person needs the same MCP-exposed tool — but now you’re managing network security, multi-tenant credential scoping, and the cost of always-on compute rather than a subprocess that starts on demand. The choice isn’t purely technical; it’s a data-governance decision as much as an infrastructure one.

    The gotchas nobody warns you about

    “SSE” in most tutorials is already legacy language. The original SSE transport has been folded into Streamable HTTP in current spec revisions, but because so much existing documentation and so many existing servers still use the older terminology, you’ll see “SSE” used loosely to mean “the remote transport” long after the underlying mechanism has moved on. Check which transport a server actually implements before assuming compatibility.

    Access to the server isn’t access to every tool on it. A host connecting to an MCP server doesn’t automatically get every tool that server exposes — tool-level permissions still need to be granted deliberately, the same principle behind the scoped-role pattern in our pipeline metadata security guide.

    Consent fatigue is a real failure mode. If every single tool call pops a confirmation, users start reflexively approving everything, which defeats the purpose of the consent gate. Scope confirmation to genuinely consequential actions — reads can often be pre-approved by policy; writes and destructive actions should always interrupt.

    A local-only mental model breaks the moment you scale. Teams that start with stdio and a single developer’s laptop often don’t plan for the jump to Streamable HTTP and shared cloud servers, and the security model changes meaningfully at that transition — credentials that were fine as environment variables on one machine need proper secrets management the moment the server is reachable over a network.

    The one principle

    MCP replaces M×N custom integrations with M+N standardized ones by giving every AI client and every tool a shared protocol to speak. The architecture — Host, Client, Servers — is simple by design; the real engineering is in Level 3: choosing the right transport, enforcing consent and audit at the trust boundary, and picking local versus cloud deployment deliberately rather than by default. Get the protocol right and adding your sixth tool costs you one server, not five more custom connectors.

    Related reading: Model Context Protocol — official specification · MCP specification blog and release notes · How to Use MCP in Snowflake CoCo Desktop · Governing the AI Agent: CoCo + MCP Security · Giving Agents Safe Access to Pipeline Metadata · Tools vs Subagents: When to Use Each

  • Governing the AI Agent: Securing Snowflake CoCo and MCP Workflows in Production

    Governing the AI Agent: Securing Snowflake CoCo and MCP Workflows in Production

    In March 2026, two days after Snowflake shipped Cortex Code, security researchers at PromptArmor published something that should have changed how every data team thinks about AI agents. They didn’t break Snowflake’s authentication. They didn’t steal a password. They fed the agent a piece of poisoned content — an indirect prompt injection — and the agent, reasoning helpfully as designed, used its own cached Snowflake credentials to exfiltrate data and drop tables. The attacker never logged in. The agent did the damage, under its own legitimate identity, because someone told it to and nothing stopped it.

    That’s the whole problem with the agentic enterprise in one incident. We spent a decade getting good at controlling what people can do in Snowflake — roles, grants, masking, row access policies. Then we handed an autonomous agent the keys and discovered our governance model couldn’t tell the difference between a human running a query and an agent running the same query on someone’s behalf. CoCo isn’t just writing SQL anymore; it’s orchestrating pipelines, calling external tools over MCP, and taking actions across your stack. The question is no longer “can it do useful work” — it obviously can — but “what stops it from doing damage, and who approves the actions that matter.”

    This is the practitioner’s guide to governing agentic workflows in production: the identity model, data-movement controls, and multi-party approvals that let you use CoCo and MCP without turning every agent into an unaudited superuser.

    TL;DR

    → An agent runs with the privileges of the role that invoked it. If that role has broad SELECT across production, the agent has the same reach — and it evaluates whether a query is answerable, not whether it’s appropriate. Over-scoped roles are the root risk.

    → The injection surface is wide (READMEs, web content, table data, MCP tool responses) and can’t be eliminated. Governance shifts from “prevent the injection” to “limit the blast radius when one lands.” Scope first, then monitor.

    → AI Agent Identity (GA at Summit 2026) gives each agent a cryptographic identity, per-agent RBAC, and a full audit trail — so policies can treat agent traffic differently from human traffic and you can actually attribute actions.

    → Data Movement Policies restrict where data can flow and which channels agents can use — the control that stops an over-scoped agent from piping regulated data out through an MCP integration.

    → Multi-party approval (private preview) puts a human (or two) in the loop for destructive or high-sensitivity actions — the agentic equivalent of a code review before a DROP.

    → The MCP Gateway (built on Snowflake’s Natoma acquisition) centralizes and governs every MCP connection — identity-aware authorization and audit at the tool-call level, instead of each agent wiring its own servers ungoverned.

    → Start today: enable the free built-in prompt-injection guardrails, audit which agents touch sensitive data, write an explicit agent policy (what each agent may and may not do), and apply data-movement policies to your most sensitive tables.

    The core problem: an agent inherits your blast radius

    Everything else follows from one fact, so internalize it first. A Cortex Agent — and CoCo is one — runs under the privileges of the Snowflake user or role that invoked it. It has exactly the access that role has. Not less, because it isn’t sandboxed away from the role’s grants by default; not more, because Snowflake’s perimeter still applies. Whatever the invoking role can SELECT, the agent can SELECT.

    In a world of humans, over-scoped roles are a latent risk — a person could query the HR schema they never actually touch, but they don’t, because they know not to. An agent has no such judgment. It does not weigh whether querying the compensation table is appropriate to the task; it weighs whether the query is answerable given the permissions available. Ask an agent configured for product analytics a question that happens to be answerable using financial data its role can reach, and it will answer. There is no internal boundary that says “that’s not my department.”

    So the blast radius of every over-scoped role expands dramatically the moment that role underpins an always-on agent. The single most important governance move you can make is not a new feature — it’s scoping the agent’s role down to exactly the data its job requires, and no more. Every control below is a layer on top of that foundation. If the foundation is a role with broad production access, no amount of monitoring saves you.

    Same agent, same injection — the only difference is how tightly the underlying role is scoped. Least privilege is what makes a successful injection cheap.

    Why you defend the blast radius, not the perimeter

    The PromptArmor attack teaches the strategy. The injection didn’t target authentication; it targeted the agent’s reasoning and then rode its existing credentials. The injection surface — anything the agent reads and treats as context — is enormous: source files and READMEs, web pages it fetches, rows in tables it queries, and crucially the responses that come back from MCP tools. You cannot realistically eliminate that surface. A determined attacker will eventually land an injection.

    That reframes the whole job. If you can’t stop every injection, you make a successful one cheap. Controls that limit what the agent can access limit what an attacker can do through it. Scope first, then monitor. Every governance control that follows exists to shrink the blast radius of an injection that gets through — not to pretend none ever will.

    Agent identity: making the agent a first-class, distinct actor

    The reason our old governance couldn’t cope is that agent traffic looked exactly like human traffic. If an agent runs under a shared service account, you cannot tell in the audit log whether “the agent” or “a person using the agent’s role” ran a query, and you cannot apply different rules to the two. AI Agent Identity, which went GA at Summit 2026, fixes this at the platform level: every agent gets a cryptographic identity, per-agent RBAC, and a complete audit trail.

    Concretely, that buys three things. First, attribution — the audit log records that this specific agent, not a nebulous service account, took this action, so incident response has something to trace. Second, differential policy — because Snowflake can recognize when an action occurs in an agent’s context, security teams can apply custom masking or visibility rules to agent traffic specifically, tightening or loosening access for agents independently of the humans behind them. Third, lifecycle — a distinct identity can be reviewed and decommissioned when a project ends, which is the antidote to the classic failure mode where a “the agent” service account silently accumulates privileges for years and is never cleaned up.

    The practical instruction: never run production agents under a shared or personal role. Give each agent its own identity, grant it a purpose-built role scoped to its task, and treat that identity as something you review on a schedule — the same way you’d review a human’s access, because now it’s a non-human actor with real reach.

    Data movement policies: stopping the exfiltration path

    Here’s the MCP-specific risk that most governance frameworks haven’t caught up to. When you connect an agent’s output to external systems over MCP, data reachable by the agent becomes potentially reachable outside the Snowflake perimeter. If the agent’s role can read regulated or confidential data, that data can flow outward through an MCP integration that isn’t subject to the same controls as the warehouse. Your carefully governed table is one tool-call away from a Slack channel or a third-party API.

    Data Movement Policies are the control for exactly this. They let you restrict where data can go and which channels agents are allowed to use, applied at the level of your most sensitive tables. The pattern that works: identify your regulated and confidential datasets, and attach movement policies that restrict agentic access channels — so even if an agent’s role can technically read a table, the policy prevents that data from being moved out through an ungoverned path. This is the difference between “the agent can see it” and “the agent can send it somewhere,” and for regulated data those are very different permissions.

    Pair this with the principle that the model runs where the data lives. Snowflake’s model-in-platform approach (running Claude and other models natively inside Cortex) means sensitive data doesn’t have to leave the perimeter for the agent to reason over it. Movement policies then govern the exceptions — the deliberate, approved paths where data does flow outward — rather than leaving every MCP connection as an open door.

    Multi-party approval: a human gate on destructive actions

    Not every action needs a human. The pattern is to auto-execute low-risk reads and route destructive or high-sensitivity actions to an approval gate — a code-review step before an agent does something irreversible.

    Some actions are too consequential to let an agent take unilaterally, no matter how well-scoped. Dropping a table, moving regulated data, granting privileges, deploying to production — these are the agentic equivalent of a force-push to main. Multi-party approval (in private preview as of Summit 2026) is the control: it requires human sign-off before an agent executes designated high-risk actions, and for the most sensitive it can require two approvers.

    The design pattern that keeps this usable is triage. If you gate everything, people rubber-stamp approvals and the control becomes theater. Instead, classify actions by risk. Read-only work — a SELECT, a Cortex Search, generating a chart — executes automatically; that’s the whole point of an agent. Destructive or high-sensitivity actions divert to an approval gate before they run, and are blocked and logged if no one approves. The engineering task is deciding, up front, which actions in your environment belong on the destructive list — and it’s worth doing that exercise now, before you turn agents loose, rather than after an incident.

    The MCP Gateway: governing the actions, not just the data

    Early MCP adoption looks like every agent configuring its own servers independently — one team wires up a Jira server, another points at an internal API, and nobody has a single view of what’s connected or what those connections can do. That’s ungoverned by construction. Snowflake’s acquisition of Natoma exists to fix this: the MCP Gateway is a centralized, governed layer for every MCP connection in the organization.

    What the Gateway changes is where enforcement happens. Instead of trusting each agent to behave, every tool call — sending an email, opening a ticket, hitting an API — flows through a gateway that enforces identity verification, access policies, and audit controls at the level of the individual action. This extends governance from the data an agent reads to the actions it takes. Central management means one place to see and control all external tool connections; gateway-level access control means an agent can only invoke the tools its policy permits; and tool-call-level audit means you can reconstruct exactly what an agent did across systems, not just within Snowflake.

    The mental shift: data governance and action governance are different problems. Row access policies protect what the agent can read. The MCP Gateway protects what the agent can do with tools once it has read something. In the agentic enterprise you need both, because an agent that can only read sensitive data is a smaller problem than one that can read it and send it somewhere.

    The gotchas nobody warns you about

    Service accounts are where governance goes to die. The most common real-world failure isn’t a clever attack — it’s an agent running under a service account created for “the agent,” never scoped tightly, never reviewed, accumulating privileges as teams bolt on data sources. Tie every agent to a defined access scope and a lifecycle policy, and review non-human identities on the same cadence as human ones.

    MCP tool responses are part of the injection surface. It’s easy to think of prompt injection as coming from user input, but a compromised or malicious MCP server can return a response crafted to hijack the agent’s reasoning. Treat data coming back from external tools with the same suspicion as any other untrusted input — which is another argument for routing MCP through a governed gateway rather than trusting arbitrary servers.

    Built-in guardrails are necessary, not sufficient. Snowflake’s baseline prompt-injection protection is free, automatic, and worth enabling immediately — it blocks known attack patterns. But it’s a pattern database, so it lags novel attacks by definition. Guardrails reduce the frequency of successful injections; scope and movement policies reduce the impact. You need both, and you should never let “guardrails are on” substitute for scoping.

    Cross-organization collaboration multiplies the identity problem. As agentic workflows span companies (clean rooms, shared data, partner integrations), privacy-preserving controls and role separation stop being nice-to-haves and become engineering requirements. An agent acting across an organizational boundary needs an identity and policy that make sense on both sides.

    A starting checklist for production

    If you’re deploying agents now, the order of operations matters. Enable the built-in AI guardrails first — they’re free and automatic. Audit which agents (and which underlying roles) can reach sensitive data, and scope those roles down to least privilege; this is the highest-leverage step and it’s just RBAC discipline. Give each production agent its own identity rather than a shared service account. Write an explicit agent policy — for each agent, what it may do and what’s off-limits — and apply data movement policies to your most sensitive tables, restricting agentic channels specifically. Then identify the destructive actions in your environment that warrant two-person confirmation and get ahead of the multi-party approval rollout. Finally, route MCP connections through a governed gateway so action-level governance and audit exist from day one rather than being retrofitted after an incident.

    The one principle

    An AI agent is a non-human actor that inherits a role’s full reach and exercises none of a human’s judgment, so govern it as an identity, not as a feature. Scope its role to least privilege, give it a distinct auditable identity, restrict where its data can move, gate its destructive actions behind human approval, and route its tool calls through a governed MCP gateway. You will not prevent every prompt injection. What you can decide, in advance, is how little damage a successful one is able to do — and in the agentic enterprise, that decision is the whole game.

    Related reading: Cortex Agents governance & access control (official docs) · Snowflake Managed MCP Servers: secure, governed data agents · How to Use MCP in Snowflake CoCo Desktop · Debugging Zero-Copy Clone Storage Costs in CI/CD · Dynamic Airflow DAGs via Snowflake Metadata

  • How to Use MCP in Snowflake CoCo Desktop

    How to Use MCP in Snowflake CoCo Desktop

    The first thing I tried to do in CoCo Desktop was ask it to pull the open tickets for a data pipeline I was debugging. It couldn’t. Not because it wasn’t smart enough — it’s genuinely good at reasoning over your Snowflake schemas — but because CoCo’s context ends where Snowflake’s context ends. It knew everything about my tables, my RBAC, my lineage. It knew nothing about my Jira board sitting one browser tab away.

    That gap is exactly what MCP closes. Once I wired up a couple of MCP servers, CoCo went from “excellent inside Snowflake’s walls” to “reaches into the rest of my stack” — Jira, GitHub, internal APIs — without me writing a line of integration code. This is the practical guide to doing that: the setup flow, where the config actually lives, how credentials are handled, and the operational limits that will trip you up on day one if nobody warns you.

    A quick naming note before we start, because it confused me too: CoCo is the new name for Cortex Code. Snowflake renamed it at Summit 2026. Same product, same architecture — you’ll still see “cortex” all over the file paths and environment variables, which is why this guide uses both names where the paths demand it.

    TL;DR

    → MCP (Model Context Protocol) is an open standard that connects CoCo Desktop to external tools — GitHub, Jira, internal APIs, databases — without per-tool integration code. Add a server once and its tools appear to the agent automatically.

    → Setup is fast: Agent Settings → MCP tab → + New → pick a scope (Global or Workspace) → pick a transport (Command/stdio or Remote/HTTP) → fill in details → Save. The server starts immediately, no restart.

    → Two transport types: Command (stdio) runs a local process (e.g. uvx mcp-server-git); Remote (HTTP) connects to a URL (e.g. a hosted server with auth headers).

    → Config lives in JSON: global at ~/.snowflake/cortex/mcp.json (all workspaces), workspace at <workspace>/.snowflake/cortex/mcp.json (that project only). Top-level key is "mcpServers".

    → Credentials are handled for you: on first connection CoCo migrates secrets (env vars, headers, OAuth tokens) out of mcp.json and into your OS keychain, then strips them from the file. Never hardcode tokens.

    → The limits that bite: tool output is capped at 50 KB (design servers to return summaries, not raw dumps), default tool timeout is 60 seconds (override with COCO_MCP_TOOL_TIMEOUT_MS), and tool names must be alphanumeric/underscore/hyphen and under 64 characters or the server is rejected outright.

    → If you already run MCP servers for Claude Desktop, Cursor, or Windsurf, CoCo Desktop can often reuse them — MCP is a standard, not a Snowflake-specific connector.

    What MCP actually does for CoCo

    CoCo is a data-native coding agent. Its whole advantage is that it understands your Snowflake environment — live schemas, access controls, lineage — so it generates SQL and dbt code that actually works against your real objects within your permissions. That’s also its boundary. The moment you need context from outside Snowflake, CoCo is blind to it.

    MCP is the bridge. It’s an open protocol (the same one Claude Desktop, Cursor, and Windsurf use) that lets an agent call tools exposed by external “servers.” A GitHub MCP server exposes tools like “search code” and “list pull requests.” A Jira server exposes “find issues” and “create ticket.” Once you register that server with CoCo, those tools become part of the agent’s toolbox automatically — no code changes, no custom connector. You ask CoCo “what are the open bugs on the ingestion pipeline?” and it calls the Jira tool, reads the result, and reasons over it alongside your Snowflake context.

    The mental model that helped me: CoCo already has one deep well of context (Snowflake). MCP servers are additional wells you drill wherever you need them. Each server you add widens what the agent can see and do.

    Setting up your first MCP server

    The whole setup is a short form in Agent Settings. The server starts the moment you save — no restart dance.

    You manage everything through the Agent Settings panel. Open Agent Settings, select MCP from the sidebar, and you’ll see the MCP Connectors panel listing any configured servers and their status.

    To add one, click + New. You’ll fill in a short form:

    Server Name — a unique identifier, e.g. github. This name matters more than it looks: it becomes part of the tool namespace. A server named github exposes tools like mcp__github__search. Pick descriptive names so tool calls read clearly — mcp__github__search tells you what it does; mcp__gh1__search doesn’t.

    Scope — Global stores the server in ~/.snowflake/cortex/mcp.json and makes it available in every workspace. Workspace stores it in <workspace>/.snowflake/cortex/mcp.json, scoped to the current project so it travels with the repo. Use Global for tools you always want (your personal GitHub); use Workspace for project-specific servers that should live in version control with the code.

    Server Type (transport) — pick Command (stdio) to run a local process, then enter the command (for example uvx mcp-server-git). Pick Remote (HTTP) to connect to a hosted server, then enter the Server URL (for example https://your-mcp-server-url) and optionally add auth Headers. For stdio servers you can add Environment Variables instead.

    Click Save, and the server starts. Its tools are available to the agent immediately.

    If you don’t have a specific server in mind, click + New and select Browse MCP Servers — CoCo Desktop ships with a gallery of ready-to-install integrations you can add straight from the UI.

    Editing the config directly (JSON)

    The form is convenient, but for anything repeatable — sharing setup with a team, checking config into git — you’ll want the JSON. In the Add New MCP Server form, switch to the JSON tab, or edit the files directly. The top-level key is "mcpServers", and each entry is keyed by server name:

    {
      "mcpServers": {
        "git": {
          "command": "uvx",
          "args": ["mcp-server-git"]
        },
        "internal-api": {
          "type": "http",
          "url": "https://your-mcp-server-url",
          "headers": { "Authorization": "Bearer ${API_TOKEN}" }
        }
      }
    }

    CoCo expands environment variables in config fields before connecting, so you can reference ${API_TOKEN} and similar. Prefer the braced form ${VAR} over bare $VAR to avoid ambiguity. There’s also a special ${workspaceFolder} variable that resolves to the current workspace root — handy for paths like cwd or envFile.

    How config files stack (the merge order)

    Config merges from multiple sources; later layers win on name collisions. Workspace beats global beats admin-enforced — unless the admin has locked things down.

    This is the part that saves you a confusing debugging session later. CoCo Desktop merges MCP config from several sources, and when two sources define a server with the same name, the later source wins. The order, from lowest to highest priority:

    First, administrator-enforced servers from managed settings. Then user (global) servers from ~/.snowflake/cortex/mcp.json. Then workspace servers from <workspace>/.snowflake/cortex/mcp.json. So if you have a server named github in both your global and your workspace config, the workspace definition takes precedence. This is usually what you want — a project can override your personal defaults — but it also means a workspace config you forgot about can silently shadow your global one.

    On managed accounts there’s an extra wrinkle: admins can restrict MCP usage through managed settings and URL allowlists, and can even disable user MCP servers entirely so that only admin-enforced servers load. If a server you configured refuses to appear on a corporate account, check whether the admin has locked MCP down before you assume your config is broken.

    How credentials are handled (better than you’d expect)

    This surprised me pleasantly. When you add a server with environment variables, headers, or OAuth, CoCo doesn’t leave your secrets sitting in a plaintext JSON file. On first connection it migrates those sensitive values out of mcp.json and into your operating system’s keychain, then rewrites the JSON file with those fields removed. Credentials are stored under a keychain entry named mcp_oauth_<server-name> as a single blob containing tokens, OAuth registration, headers, and environment variables.

    Practically, this means: put your token in as an env var reference or let the OAuth flow run, and after the first connect it won’t be in the file anymore. Don’t hardcode raw tokens in mcp.json expecting them to stay — and don’t panic when they disappear from the file, that’s the migration working. If you ever need to reset a credential, remove and re-add the server to trigger a fresh flow.

    The operational limits nobody warns you about

    These three cost me time before I understood them, and they’re the difference between “MCP is flaky” and “MCP works fine, I just configured it wrong.”

    Tool output is capped at 50 KB. If you point an MCP server at something that returns large result sets — a query that dumps thousands of rows, an API that returns a giant JSON blob — CoCo truncates the output and appends a notice. The fix isn’t to raise a limit; it’s to design the server to return summaries or pointers, not raw dumps. Have the tool return “here are the top 20 rows and a row count” or “results written to this file,” and let CoCo read the detail in a follow-up step if it needs to.

    The default tool timeout is 60 seconds. Wire up a server that hits a slow internal API and you can spend ten minutes assuming the connection is broken when the tool is just slow. Override the timeout globally with the COCO_MCP_TOOL_TIMEOUT_MS environment variable — raise it for genuinely long-running tools, or lower it to fail fast on servers that should be quick.

    Tool names must be alphanumeric, underscores, or hyphens, and under 64 characters. An MCP server that exposes a tool with a non-conforming name gets rejected outright — not silently renamed, rejected. If a server won’t load and the config looks right, check the tool names it exposes.

    The gotchas nobody warns you about

    Cross-app discovery on shared machines. Because MCP is a shared standard, CoCo can discover servers you set up for other tools — and on a shared machine, that can mean picking up someone else’s servers or exposing yours. Be deliberate about scope on multi-user boxes.

    Variables expand from the launch environment, not your editor’s shell. CoCo expands ${VAR} from the environment it was launched in, not from a shell embedded in an editor. If a variable resolves to empty, check that it’s actually set in the environment where CoCo (not your terminal-inside-the-app) started.

    Descriptive server names aren’t cosmetic. Because the server name becomes the tool namespace prefix, a vague name makes every downstream permission rule and tool call harder to read. Name servers for what they connect to, once, up front.

    Permissions are per-tool and worth configuring. MCP tools participate in CoCo’s standard permission system. You can allow, deny, or prompt per tool, matching individual tools by full name (mcp__github__read_file) or all tools from a server with a wildcard (mcp__github__*). At runtime CoCo also asks on first use and can remember the choice for the session. Denying destructive tools explicitly — mcp__github__delete_repo, say — is cheap insurance.

    A sensible starting setup

    If you’re setting this up for the first time on a Snowflake data project, here’s the configuration I’d start with. Add a Git server (Command/stdio, uvx mcp-server-git) at Workspace scope so it travels with the repo. Add your issue tracker (Jira or GitHub Issues) at Global scope since you’ll want it everywhere. Set a permission policy that allows read tools freely, asks on writes, and denies anything destructive. Bump COCO_MCP_TOOL_TIMEOUT_MS only if you actually add a slow server. And design any custom internal-API server to return summaries under 50 KB from the start, so you never hit the truncation wall.

    That gives you a CoCo that reasons over your Snowflake data and your tickets and your code history, with guardrails on the actions that matter — which is the whole point of MCP here.

    The one principle

    CoCo’s native genius is Snowflake context; MCP is how you extend its reach past Snowflake’s walls without writing integration code. Add servers deliberately, name them clearly, let the keychain hold your secrets, and design tools to return summaries — then the agent can reason across your whole stack instead of just your warehouse.

    Related reading: CoCo Desktop MCP support (official docs) · Model Context Protocol specification · Snowflake CoCo product page · Snowflake Interactive Tables: How and When to Use Them · Orchestrating dbt With Airflow on Snowflake