Author: Sainath Reddy

  • Governing the AI Agent: Securing Snowflake CoCo and MCP Workflows in Production

    Governing the AI Agent: Securing Snowflake CoCo and MCP Workflows in Production

    In March 2026, two days after Snowflake shipped Cortex Code, security researchers at PromptArmor published something that should have changed how every data team thinks about AI agents. They didn’t break Snowflake’s authentication. They didn’t steal a password. They fed the agent a piece of poisoned content — an indirect prompt injection — and the agent, reasoning helpfully as designed, used its own cached Snowflake credentials to exfiltrate data and drop tables. The attacker never logged in. The agent did the damage, under its own legitimate identity, because someone told it to and nothing stopped it.

    That’s the whole problem with the agentic enterprise in one incident. We spent a decade getting good at controlling what people can do in Snowflake — roles, grants, masking, row access policies. Then we handed an autonomous agent the keys and discovered our governance model couldn’t tell the difference between a human running a query and an agent running the same query on someone’s behalf. CoCo isn’t just writing SQL anymore; it’s orchestrating pipelines, calling external tools over MCP, and taking actions across your stack. The question is no longer “can it do useful work” — it obviously can — but “what stops it from doing damage, and who approves the actions that matter.”

    This is the practitioner’s guide to governing agentic workflows in production: the identity model, data-movement controls, and multi-party approvals that let you use CoCo and MCP without turning every agent into an unaudited superuser.

    TL;DR

    → An agent runs with the privileges of the role that invoked it. If that role has broad SELECT across production, the agent has the same reach — and it evaluates whether a query is answerable, not whether it’s appropriate. Over-scoped roles are the root risk.

    → The injection surface is wide (READMEs, web content, table data, MCP tool responses) and can’t be eliminated. Governance shifts from “prevent the injection” to “limit the blast radius when one lands.” Scope first, then monitor.

    → AI Agent Identity (GA at Summit 2026) gives each agent a cryptographic identity, per-agent RBAC, and a full audit trail — so policies can treat agent traffic differently from human traffic and you can actually attribute actions.

    → Data Movement Policies restrict where data can flow and which channels agents can use — the control that stops an over-scoped agent from piping regulated data out through an MCP integration.

    → Multi-party approval (private preview) puts a human (or two) in the loop for destructive or high-sensitivity actions — the agentic equivalent of a code review before a DROP.

    → The MCP Gateway (built on Snowflake’s Natoma acquisition) centralizes and governs every MCP connection — identity-aware authorization and audit at the tool-call level, instead of each agent wiring its own servers ungoverned.

    → Start today: enable the free built-in prompt-injection guardrails, audit which agents touch sensitive data, write an explicit agent policy (what each agent may and may not do), and apply data-movement policies to your most sensitive tables.

    The core problem: an agent inherits your blast radius

    Everything else follows from one fact, so internalize it first. A Cortex Agent — and CoCo is one — runs under the privileges of the Snowflake user or role that invoked it. It has exactly the access that role has. Not less, because it isn’t sandboxed away from the role’s grants by default; not more, because Snowflake’s perimeter still applies. Whatever the invoking role can SELECT, the agent can SELECT.

    In a world of humans, over-scoped roles are a latent risk — a person could query the HR schema they never actually touch, but they don’t, because they know not to. An agent has no such judgment. It does not weigh whether querying the compensation table is appropriate to the task; it weighs whether the query is answerable given the permissions available. Ask an agent configured for product analytics a question that happens to be answerable using financial data its role can reach, and it will answer. There is no internal boundary that says “that’s not my department.”

    So the blast radius of every over-scoped role expands dramatically the moment that role underpins an always-on agent. The single most important governance move you can make is not a new feature — it’s scoping the agent’s role down to exactly the data its job requires, and no more. Every control below is a layer on top of that foundation. If the foundation is a role with broad production access, no amount of monitoring saves you.

    Same agent, same injection — the only difference is how tightly the underlying role is scoped. Least privilege is what makes a successful injection cheap.

    Why you defend the blast radius, not the perimeter

    The PromptArmor attack teaches the strategy. The injection didn’t target authentication; it targeted the agent’s reasoning and then rode its existing credentials. The injection surface — anything the agent reads and treats as context — is enormous: source files and READMEs, web pages it fetches, rows in tables it queries, and crucially the responses that come back from MCP tools. You cannot realistically eliminate that surface. A determined attacker will eventually land an injection.

    That reframes the whole job. If you can’t stop every injection, you make a successful one cheap. Controls that limit what the agent can access limit what an attacker can do through it. Scope first, then monitor. Every governance control that follows exists to shrink the blast radius of an injection that gets through — not to pretend none ever will.

    Agent identity: making the agent a first-class, distinct actor

    The reason our old governance couldn’t cope is that agent traffic looked exactly like human traffic. If an agent runs under a shared service account, you cannot tell in the audit log whether “the agent” or “a person using the agent’s role” ran a query, and you cannot apply different rules to the two. AI Agent Identity, which went GA at Summit 2026, fixes this at the platform level: every agent gets a cryptographic identity, per-agent RBAC, and a complete audit trail.

    Concretely, that buys three things. First, attribution — the audit log records that this specific agent, not a nebulous service account, took this action, so incident response has something to trace. Second, differential policy — because Snowflake can recognize when an action occurs in an agent’s context, security teams can apply custom masking or visibility rules to agent traffic specifically, tightening or loosening access for agents independently of the humans behind them. Third, lifecycle — a distinct identity can be reviewed and decommissioned when a project ends, which is the antidote to the classic failure mode where a “the agent” service account silently accumulates privileges for years and is never cleaned up.

    The practical instruction: never run production agents under a shared or personal role. Give each agent its own identity, grant it a purpose-built role scoped to its task, and treat that identity as something you review on a schedule — the same way you’d review a human’s access, because now it’s a non-human actor with real reach.

    Data movement policies: stopping the exfiltration path

    Here’s the MCP-specific risk that most governance frameworks haven’t caught up to. When you connect an agent’s output to external systems over MCP, data reachable by the agent becomes potentially reachable outside the Snowflake perimeter. If the agent’s role can read regulated or confidential data, that data can flow outward through an MCP integration that isn’t subject to the same controls as the warehouse. Your carefully governed table is one tool-call away from a Slack channel or a third-party API.

    Data Movement Policies are the control for exactly this. They let you restrict where data can go and which channels agents are allowed to use, applied at the level of your most sensitive tables. The pattern that works: identify your regulated and confidential datasets, and attach movement policies that restrict agentic access channels — so even if an agent’s role can technically read a table, the policy prevents that data from being moved out through an ungoverned path. This is the difference between “the agent can see it” and “the agent can send it somewhere,” and for regulated data those are very different permissions.

    Pair this with the principle that the model runs where the data lives. Snowflake’s model-in-platform approach (running Claude and other models natively inside Cortex) means sensitive data doesn’t have to leave the perimeter for the agent to reason over it. Movement policies then govern the exceptions — the deliberate, approved paths where data does flow outward — rather than leaving every MCP connection as an open door.

    Multi-party approval: a human gate on destructive actions

    Not every action needs a human. The pattern is to auto-execute low-risk reads and route destructive or high-sensitivity actions to an approval gate — a code-review step before an agent does something irreversible.

    Some actions are too consequential to let an agent take unilaterally, no matter how well-scoped. Dropping a table, moving regulated data, granting privileges, deploying to production — these are the agentic equivalent of a force-push to main. Multi-party approval (in private preview as of Summit 2026) is the control: it requires human sign-off before an agent executes designated high-risk actions, and for the most sensitive it can require two approvers.

    The design pattern that keeps this usable is triage. If you gate everything, people rubber-stamp approvals and the control becomes theater. Instead, classify actions by risk. Read-only work — a SELECT, a Cortex Search, generating a chart — executes automatically; that’s the whole point of an agent. Destructive or high-sensitivity actions divert to an approval gate before they run, and are blocked and logged if no one approves. The engineering task is deciding, up front, which actions in your environment belong on the destructive list — and it’s worth doing that exercise now, before you turn agents loose, rather than after an incident.

    The MCP Gateway: governing the actions, not just the data

    Early MCP adoption looks like every agent configuring its own servers independently — one team wires up a Jira server, another points at an internal API, and nobody has a single view of what’s connected or what those connections can do. That’s ungoverned by construction. Snowflake’s acquisition of Natoma exists to fix this: the MCP Gateway is a centralized, governed layer for every MCP connection in the organization.

    What the Gateway changes is where enforcement happens. Instead of trusting each agent to behave, every tool call — sending an email, opening a ticket, hitting an API — flows through a gateway that enforces identity verification, access policies, and audit controls at the level of the individual action. This extends governance from the data an agent reads to the actions it takes. Central management means one place to see and control all external tool connections; gateway-level access control means an agent can only invoke the tools its policy permits; and tool-call-level audit means you can reconstruct exactly what an agent did across systems, not just within Snowflake.

    The mental shift: data governance and action governance are different problems. Row access policies protect what the agent can read. The MCP Gateway protects what the agent can do with tools once it has read something. In the agentic enterprise you need both, because an agent that can only read sensitive data is a smaller problem than one that can read it and send it somewhere.

    The gotchas nobody warns you about

    Service accounts are where governance goes to die. The most common real-world failure isn’t a clever attack — it’s an agent running under a service account created for “the agent,” never scoped tightly, never reviewed, accumulating privileges as teams bolt on data sources. Tie every agent to a defined access scope and a lifecycle policy, and review non-human identities on the same cadence as human ones.

    MCP tool responses are part of the injection surface. It’s easy to think of prompt injection as coming from user input, but a compromised or malicious MCP server can return a response crafted to hijack the agent’s reasoning. Treat data coming back from external tools with the same suspicion as any other untrusted input — which is another argument for routing MCP through a governed gateway rather than trusting arbitrary servers.

    Built-in guardrails are necessary, not sufficient. Snowflake’s baseline prompt-injection protection is free, automatic, and worth enabling immediately — it blocks known attack patterns. But it’s a pattern database, so it lags novel attacks by definition. Guardrails reduce the frequency of successful injections; scope and movement policies reduce the impact. You need both, and you should never let “guardrails are on” substitute for scoping.

    Cross-organization collaboration multiplies the identity problem. As agentic workflows span companies (clean rooms, shared data, partner integrations), privacy-preserving controls and role separation stop being nice-to-haves and become engineering requirements. An agent acting across an organizational boundary needs an identity and policy that make sense on both sides.

    A starting checklist for production

    If you’re deploying agents now, the order of operations matters. Enable the built-in AI guardrails first — they’re free and automatic. Audit which agents (and which underlying roles) can reach sensitive data, and scope those roles down to least privilege; this is the highest-leverage step and it’s just RBAC discipline. Give each production agent its own identity rather than a shared service account. Write an explicit agent policy — for each agent, what it may do and what’s off-limits — and apply data movement policies to your most sensitive tables, restricting agentic channels specifically. Then identify the destructive actions in your environment that warrant two-person confirmation and get ahead of the multi-party approval rollout. Finally, route MCP connections through a governed gateway so action-level governance and audit exist from day one rather than being retrofitted after an incident.

    The one principle

    An AI agent is a non-human actor that inherits a role’s full reach and exercises none of a human’s judgment, so govern it as an identity, not as a feature. Scope its role to least privilege, give it a distinct auditable identity, restrict where its data can move, gate its destructive actions behind human approval, and route its tool calls through a governed MCP gateway. You will not prevent every prompt injection. What you can decide, in advance, is how little damage a successful one is able to do — and in the agentic enterprise, that decision is the whole game.

    Related reading: Cortex Agents governance & access control (official docs) · Snowflake Managed MCP Servers: secure, governed data agents · How to Use MCP in Snowflake CoCo Desktop · Debugging Zero-Copy Clone Storage Costs in CI/CD · Dynamic Airflow DAGs via Snowflake Metadata

  • The Dark Side of dbt Unit Testing in Snowflake: Managing Credit Burn on Large Test Suites

    The Dark Side of dbt Unit Testing in Snowflake: Managing Credit Burn on Large Test Suites

    Our CI got slower and more expensive at exactly the same rate our test suite got better, and for a while nobody connected the two. We’d done everything the best-practice blog posts told us to: added dbt unit tests to lock down the gnarly transformation logic, wired them into CI so every pull request ran them, felt good about ourselves. Then the Snowflake bill for the CI account crept up, and up, and the person who opened it asked the reasonable question: “Why is *testing* our most expensive warehouse workload?”

    Because dbt unit tests, for all their software-engineering framing, are not free the way unit tests in a normal codebase are free. A Python unit test runs in memory on the machine you’re already paying for. A dbt unit test compiles to SQL and runs on a Snowflake warehouse — and at the scale of a real suite, run on every pull request, that’s a lot of warehouse-seconds you didn’t budget for. This is the honest accounting of where that cost comes from, and how to keep the safety net without the bill.

    One clarification up front, because the word “test” covers two very different things in dbt and conflating them muddies the whole cost conversation. This article is about unit tests — the dbt v1.8+ feature that validates your transformation logic against mock inputs — not data tests (not_nullunique, and friends) that query your real tables. Both cost credits, but they cost them differently, and unit tests have a hidden cost that surprises people.

    TL;DR

    → dbt unit tests validate transformation logic with static mock inputs. But they don’t run in memory — each compiles to a real SQL query that executes on a Snowflake warehouse. Hundreds of tests × every CI run × every PR = real, recurring credit burn.

    → The hidden cost: a unit test’s direct parent models must exist in the warehouse before the test can run. Naively, that means building upstream models just to test one — you pay to materialize parents you don’t care about.

    → The fix for that specific trap: the --empty flag builds empty (zero-row) versions of the parent models, so they exist for the test to reference without paying to populate them.

    → dbt Labs is explicit: only run unit tests in development and CI, never in production. The inputs are static, so production runs burn compute for zero added signal.

    → Warehouse mechanics amplify it: Snowflake bills a 60-second minimum every time a warehouse resumes, so a suite that resumes the warehouse repeatedly pays that floor over and over.

    → The real levers: run only state:modified+ (tests for changed models, not the whole suite), use --empty parents, run on a dedicated XS warehouse with aggressive auto-suspend, and don’t unit-test logic the warehouse already guarantees (like min()).

    How a dbt unit test actually runs

    Here’s the thing the “just like software unit tests” framing hides. When you write a unit test in a normal language, the test harness loads your function into memory and calls it with fake arguments. Nothing leaves the machine. It’s effectively free and effectively instant.

    A dbt unit test does something structurally different. dbt takes your mock input rows, your model’s SQL, and your expected output, and compiles them into a single SQL query — roughly, it injects your fake rows as inline literals, runs them through the actual transformation logic of the model, and compares the result to your expected rows. That compiled query then executes on your Snowflake warehouse like any other query. The “unit” is isolated in the sense that it uses mock data instead of real tables — but the execution is a genuine warehouse query, billed at the standard credit rate for the warehouse’s active time.

    One query is cheap. The problem is arithmetic. A mature suite might have 300 unit tests. Run them on every pull request, and every push to every PR, across a team, and you’re issuing tens of thousands of compiled test queries a week. None is expensive alone; together they’re a line item. And unlike a data test that you might run once daily in production, unit tests fire in the tight inner loop of development, which is exactly where query volume is highest.

    No single test query is expensive. The multiplication across a suite, every CI run, is — and two Snowflake billing mechanics quietly amplify it.

    The hidden cost nobody mentions: parent materialization

    A unit test needs its parent models to exist in the warehouse first. Build them naively and you pay to materialize upstream models just to test one — unless you use –empty.

    This is the trap that turns a manageable cost into a surprising one. A dbt unit test runs against a model, and that model refers to its parents via ref(). For the compiled test query to resolve, the direct parent models have to exist in the warehouse. If they don’t, the test can’t run.

    The naive reaction — and the one dbt’s own docs warn about — is to just build everything upstream first: dbt build, or dbt run the parents, then test. But that means you’ve now materialized a chain of upstream models, scanning and writing real data, purely so a logic test on one downstream model has something to reference. You paid full transformation cost to set up a test that was supposed to be about logic, not data.

    The intended fix is the --empty flag. Running dbt run --select "stg_orders stg_customers" --empty builds empty versions of the parent models — they exist as objects in the warehouse with the right schema but zero rows, so they cost almost nothing to create. The unit test can now resolve its ref()s against those empty parents while still using its own mock data for the actual test. If you’re running unit tests in CI without --empty, this is very likely the single biggest chunk of your test-related spend, and it’s invisible until you look at what got built versus what got tested.

    The warehouse mechanics that amplify it

    Two Snowflake billing details make test-suite cost worse than a naive per-query estimate suggests.

    First, the 60-second minimum. Snowflake bills warehouse compute per second, but with a 60-second floor every time a warehouse resumes from suspended. A single fast test query that takes two seconds still bills a full minute if it resumed a cold warehouse. If your CI pattern lets the warehouse suspend and resume repeatedly across a run, you pay that one-minute floor multiple times for work that totaled seconds.

    Second, warehouse size is usually the wrong knob to reach for, but people reach for it anyway. Teams default to a LARGE or XLARGE warehouse “to be safe,” but unit tests operate on tiny mock datasets — a handful of rows. There is nothing for a big warehouse to parallelize. You’re paying 8x or 16x the per-second rate for a workload that an XSMALL handles identically. For unit testing specifically, warehouse size is close to pure waste above XSMALL.

    The cost math, concretely

    Let’s put rough numbers on it. Say you have 300 unit tests, a team of 6 engineers, and CI runs on every push. A realistic week might see 200 CI runs. If each run executes the full suite and — because nobody set up --empty — also materializes a chunk of the upstream DAG each time, you’re looking at hundreds of thousands of query-seconds plus repeated 60-second warehouse-resume floors.

    Even at a modest XSMALL (1 credit/hour), the repeated resume floors alone add up: 200 runs a week that each cold-start the warehouse is 200 minutes — over 3 hours — of billed time that did almost no work. Add the parent materializations at full data volume and the number climbs fast. Now imagine someone “played it safe” with a MEDIUM warehouse (4 credits/hour): same work, 4x the bill. None of this bought you better tests. It bought you the same tests, slower to notice and more expensive to run.

    The reframe that matters: unit-test cost scales with how you run the suite, not with how good your tests are. Two teams with identical test coverage can have a 10x difference in test spend based purely on --empty, warehouse size, and whether they run the whole suite or just what changed.

    Keeping the safety net without the bill

    Two teams with identical coverage can differ 10x in spend. These are the knobs that account for the gap, biggest win first.

    Run only what changed. The biggest lever by far. In CI you rarely need the whole suite — you need the tests affected by this pull request. dbt’s state comparison lets you select state:modified+ to run only modified models and their downstream dependents. On a big project, a typical PR touches a handful of models, so this turns a 300-test run into a 15-test run. Same protection for the change at hand, a fraction of the queries.

    Always build parents with --empty. Make it the default in your CI script, not an optimization you remember sometimes. Empty parents give the tests something to reference without paying to populate upstream models. This is the fix for the hidden cost above, and it’s a one-flag change.

    Use a dedicated XSMALL CI warehouse with aggressive auto-suspend. Size it down — unit tests don’t benefit from more compute. Give it its own warehouse so test runs don’t tangle with analyst queries or production jobs, which also makes the cost trivially easy to attribute. Set auto-suspend low so it doesn’t idle-bill after the run, but be aware of the flip side: too-frequent suspend/resume cycles trigger the 60-second floor repeatedly, so tune it to your CI cadence rather than blindly to the minimum.

    Never run unit tests in production. dbt Labs is unambiguous here, and it’s worth internalizing why: unit test inputs are static mock data, so the result is identical every time regardless of what’s in production. Running them against prod burns compute to re-confirm something that cannot have changed. Unit tests belong in development (test-driven work) and CI (catching regressions before merge) — full stop.

    Don’t test what the warehouse already guarantees. dbt Labs recommends against unit-testing built-in functions like min() — they’re already exhaustively tested by Snowflake, and a fixture that checks them tells you nothing while still costing a query. Aim unit tests at logic that actually has edge cases: custom categorization, window functions, business rules, things you’ve had bugs in before. Every test you don’t write because it adds no signal is a query you never pay for.

    The gotchas nobody warns you about

    Incremental models need to exist before you unit-test them. Like other parents, an incremental model must be present in the database before its unit test runs, and the expected output of a unit test on an incremental model is the result of the materialization step (what gets merged/inserted), not the final table state. Build it with --empty first, same as any parent, and be precise about what you’re asserting.

    Ephemeral parents force a format change. If the model under test depends on an ephemeral model, you can’t reference it the usual way — you have to provide that input as raw SQL (format: sql) in the test fixture. Not a cost issue, but a “why won’t this run” issue that eats debugging time.

    The suite’s cost is invisible in aggregate dashboards. Test queries blend into total warehouse spend and look like noise. To actually see them, tag your CI runs — dbt’s query-comment with the invocation_id lets you filter QUERY_HISTORY to a single test run and total its cost. If you can’t measure per-invocation test spend, you can’t tell whether your fixes worked.

    “Add more tests” has a non-zero marginal cost here. In a normal codebase, adding a unit test is free forever after. In dbt, every unit test you add is a query that runs on every relevant CI invocation for the life of the project. That’s not a reason to skip tests — it’s a reason to be deliberate: test high-value logic, skip the trivial, and let state:modified+ keep the per-run count proportional to the change, not the suite.

    The one principle

    A dbt unit test is not an in-memory assertion; it’s a warehouse query with a prerequisite. Treat it like one. Build parents empty, run only what changed, size the warehouse down, keep it out of production, and test logic that actually has edge cases. The goal isn’t fewer tests — it’s a test suite whose cost tracks the size of your changes, not the size of your suite. Do that, and unit testing stays the cheap safety net it’s supposed to be instead of the line item that makes someone ask why testing is your priciest workload.

    Related reading: dbt: Unit tests (official docs) · Understanding costs for dbt Projects on Snowflake · dbt State on Snowflake: Skip Unchanged Models · Debugging Zero-Copy Clone Storage Costs in CI/CD · Orchestrating dbt With Airflow on Snowflake

  • Dynamic Airflow DAGs via Snowflake Metadata: Eliminating Hardcoded Pipeline Tasks

    Dynamic Airflow DAGs via Snowflake Metadata: Eliminating Hardcoded Pipeline Tasks

    I once inherited an Airflow repo with 214 DAG files that were, functionally, the same DAG. Each one extracted a table from a source system, loaded it into Snowflake, and ran a transform. The only differences between them were the table name, the schedule, and which SQL file to run. Someone had copy-pasted the template 214 times, and every schema change meant a find-and-replace across 214 files and a prayer that nothing got missed. Onboarding a new table meant copy-pasting a 215th.

    That repo is the case against hardcoded pipeline tasks in a single painful sentence: if the only thing that changes between your DAGs is data, then your DAGs should be generated from data. The fix is to move the pipeline definitions out of Python files and into a Snowflake metadata table, then generate the DAGs from that table. Add a row, get a pipeline. Change a row, change a pipeline. No copy-paste, no 214-file find-and-replace.

    This is the guide to doing that properly — including the distinction that trips most people up (there are two completely different “dynamic” features in Airflow and they solve different problems), the metadata-driven generation pattern, and the parsing gotchas that will wreck your scheduler if you get them wrong.

    TL;DR

    → Two different features share the word “dynamic.” Dynamic DAG generation builds DAG structure at parse time from config/metadata — the task count is fixed for a given run. Dynamic task mapping (.expand()) creates N task instances at runtime from an upstream task’s output. They solve different problems; you’ll often use both.

    → The metadata-driven pattern: store pipeline definitions (DAG name, tasks, schedule, SQL file, parent/child dependencies) in a Snowflake table → feed each row into a Jinja template → render a dag.py file per pipeline. Add a row, get a DAG.

    → Add operational columns to the metadata table — created_at and last_updated_at — so you can track which pipelines exist and trigger regeneration when a definition changes.

    → Use environment variables, not Airflow Variables, in top-level DAG code. Airflow Variables hit the metadata DB on every parse and will slow your scheduler to a crawl.

    → Generate tasks in a stable, sorted order every time (ORDER BY in your query or sorted() in Python), or the Grid View reshuffles tasks on every refresh and your history becomes unreadable.

    → For large numbers of generated DAGs, use get_parsing_context() to skip building DAG objects you don’t need during task execution — one documented case cut parsing from 120s to 200ms.

    → Use dynamic task mapping when the count is unknown until runtime (e.g. “process however many files landed today”). Note trigger_rule=ALWAYS is not allowed on task-generated mapped tasks.

    The distinction that trips everyone up

    Before any code, get this straight, because conflating the two is the single most common source of confusion I see. Airflow has two features with “dynamic” in the name and they are not interchangeable.

    Dynamic DAG generation is about producing DAG files or objects programmatically. Instead of hand-writing 214 near-identical DAGs, you write one generator that reads definitions from somewhere (a config file, a metadata table) and emits the DAGs. The important property: the structure is decided at parse time, when Airflow loads the DAG file. For a given DAG run, the number of tasks is fixed. This is what you want when you have many similar pipelines that differ only by parameters.

    Dynamic task mapping (introduced in Airflow 2.3, via .expand() and .map()) is about creating task instances at runtime. A task returns a list, and Airflow creates one copy of a downstream task per element — and it doesn’t know how many until the upstream task actually runs. This is the MapReduce model: the scheduler creates N copies of the mapped task right before execution. This is what you want when the count is genuinely unknown until runtime — “process each file that landed in S3 today,” where “today” might be 3 files or 300.

    The rule of thumb: if you know the shape of the work when the DAG is parsed, use dynamic DAG generation. If the shape depends on data that only exists at runtime, use dynamic task mapping. A mature setup often uses both — generated DAGs whose internal tasks map over runtime data.

    Left: fixed structure known at parse time. Right: task instances fanned out at runtime. Same word, opposite problems.

    The metadata-driven pattern

    The pipeline that builds pipelines: a Snowflake metadata table feeds a Jinja template that renders one dag.py per row, which Airflow then parses like any other DAG.

    The architecture has four moving parts. First, a metadata table in Snowflake that holds pipeline definitions. At minimum it stores, per task: the DAG name it belongs to, the task name, the schedule, what the task runs (say, a SQL file path), and the parent/child dependency links. A row-per-task layout with a parent_task column lets you express arbitrary dependency graphs — a task names its parent, and the generator wires the edges.

    Here’s a minimal shape:

    CREATE TABLE pipeline_metadata (
      dag_name      STRING,
      task_name     STRING,
      parent_task   STRING,  -- NULL for a root task
      schedule      STRING,  -- e.g. '0 2 * * *'
      sql_file      STRING,  -- what the task executes
      is_active     BOOLEAN,
      created_at    TIMESTAMP,
      last_updated_at TIMESTAMP
    );

    Second, a Jinja template — a .j2 file that looks like a DAG with placeholders where the metadata values go: the DAG id, the schedule, a loop that emits one operator per task, and the dependency wiring. Third, a generator that queries the metadata table, groups rows by dag_name, and renders the template once per DAG, writing out a dag.py file. Fourth, Airflow’s normal DAG File Processor, which parses those rendered files exactly as if you’d hand-written them.

    The payoff is the operational columns. Because each row carries created_at and last_updated_at, you can tell when a pipeline was first defined and when it last changed. When someone edits a definition, last_updated_at moves, and you can trigger regeneration for just the affected DAGs rather than rebuilding everything. Onboarding a new pipeline is now an INSERT, not a new file.

    Rendering the DAG from a row

    The generator itself is short. Conceptually: query the active metadata, group by DAG, and for each group render the template with that group’s tasks and dependencies. A sketch:

    from jinja2 import Environment, FileSystemLoader
    import os
    
    # env var, NOT an Airflow Variable — see the parsing note below
    env = os.environ.get("DEPLOYMENT", "PROD")
    
    rows = run_query("""
      SELECT dag_name, task_name, parent_task, schedule, sql_file
      FROM pipeline_metadata
      WHERE is_active = TRUE
      ORDER BY dag_name, task_name  -- stable order, always
    """)
    
    template = Environment(loader=FileSystemLoader("templates")) \
        .get_template("dag_template.j2")
    
    for dag_name, tasks in group_by_dag(rows):
      rendered = template.render(dag_name=dag_name, tasks=tasks, env=env)
      with open(f"dags/{dag_name}.py", "w") as f:
        f.write(rendered)

    Notice the ORDER BY. That is not cosmetic — it’s load-bearing, and the next section explains why.

    The parsing gotchas that wreck schedulers

    Three parse-time mistakes and their fixes. Every one of these is invisible until your scheduler is under load, then very visible.

    Dynamic generation runs at parse time, and the DAG File Processor parses your files constantly. Anything expensive or unstable in that path multiplies across every parse. Three specific mistakes:

    Airflow Variables in top-level code. It’s tempting to configure your generator with Variable.get("something"). Don’t, not at the top level. Every Airflow Variable read in top-level code opens a connection to the metadata database, and top-level code runs on every parse. At scale this hammers your metadata DB and drags parsing. Use environment variables (os.environ.get(...)) for anything read during generation — they’re free to read and don’t touch the DB.

    Unstable task ordering. If your generator emits tasks in a different order on different parses — because the query has no ORDER BY, or you iterated a Python set — Airflow’s Grid View reshuffles the task rows every time it refreshes. Your run history becomes impossible to read, and it looks like the DAG is changing when it isn’t. Always impose a stable order: ORDER BY in the query, or sorted() in Python. Deterministic generation is not optional.

    Parsing every DAG on every task execution. The DAG File Processor loads the whole file to get metadata, but executing a single task only needs that one DAG object. If your generator builds hundreds of DAGs in one file, every task execution pays to construct all of them. The fix is get_parsing_context(): check which DAG is actually being parsed and skip generating the rest. The documented “Magic Loop” example cut parsing from 120 seconds to 200 milliseconds this way. It’s most valuable when the generated-DAG count is high — use it with care and test it, since it doesn’t apply if later DAGs depend on earlier ones.

    When to reach for dynamic task mapping instead

    Everything above generates structure from metadata known at parse time. But some workloads only reveal their shape at runtime, and that’s dynamic task mapping’s job. The canonical example is file processing: an unknown number of files land in cloud storage each day, and you want one task instance per file loaded into Snowflake.

    The pattern is a task that returns the list, and a downstream task that expands over it:

    @task
    def list_new_files():
      return get_s3_keys(prefix=f"{{{{ ds_nodash }}}}/")  # however many landed
    
    @task
    def load_to_snowflake(key):
      copy_into_snowflake(key)
    
    load_to_snowflake.expand(key=list_new_files())

    The scheduler creates one load_to_snowflake instance per key, right before execution, and the Grid View shows the mapped count in brackets. You can also map over task groups with the @task_group decorator and .expand() when each unit of work is several steps, using the map_indexes parameter to pull the right XCom per instance. One constraint to remember: trigger_rule=TriggerRule.ALWAYS is not allowed on a task-generated mapped task, because the expanded parameters are undefined at the moment of immediate execution — Airflow raises an error at parse time if you try.

    Cost and maintenance math

    The win here isn’t compute cost, it’s maintenance cost, and it compounds. Go back to the 214-DAG repo. A schema change that touched every pipeline meant editing 214 files — call it a day of careful, error-prone work, plus review, plus the near-certainty of missing one. With metadata-driven generation, the same change is either one UPDATE to the metadata table or one edit to the shared Jinja template, followed by regeneration. Minutes, not a day, and uniform by construction — you cannot miss one, because there’s only one definition.

    Onboarding scales the same way. In the file-per-pipeline world, each new table is a new hand-authored file and a new opportunity for drift. In the metadata world it’s an INSERT. Ten new tables is ten rows. The marginal cost of a pipeline drops toward zero, which changes what’s worth automating — pipelines that weren’t worth hand-writing become trivially worth a row.

    The gotchas nobody warns you about

    Generation failure takes down everything at once. The flip side of one definition is one point of failure. A bug in the template or generator doesn’t break one DAG, it breaks all of them. Validate rendered output (even a quick python -c "compile(...)" check) before writing files, and keep the last-good rendered files so a bad generation doesn’t wipe working DAGs.

    Metadata and reality drift. The metadata table says what pipelines should exist; the dags/ folder holds what does. If someone edits a rendered file by hand, or a row is deleted without removing the file, the two diverge. Treat rendered files as build artifacts, never edit them directly, and have regeneration remove files for DAGs no longer in the metadata.

    Secrets don’t belong in the metadata table. It’s tempting to store connection details per pipeline. Keep credentials in Airflow Connections or a secrets backend and reference them by name from the metadata — the table should hold pipeline structure, not secrets.

    Too much magic hurts debuggability. A generated DAG is one level removed from the code you read. When something breaks at 2 a.m., the on-call engineer is debugging rendered output, not the template. Keep the template readable, keep the rendered files on disk (don’t generate purely in memory), and make it obvious which metadata row produced which DAG.

    The one principle

    If the only thing that changes between your pipelines is data, define them with data, not code. Put pipeline definitions in a Snowflake metadata table, render them through one Jinja template, and let Airflow parse the result — but keep generation deterministic, keep Airflow Variables out of top-level code, and remember that one definition means one point of failure worth guarding. The goal isn’t cleverness; it’s that onboarding the 215th pipeline should be an INSERT, and a schema change should touch one place, not two hundred.

    Related reading: Airflow: Dynamic DAG Generation (official docs) · Airflow: Dynamic Task Mapping (official docs) · Orchestrating dbt With Airflow on Snowflake · dbt State on Snowflake: Skip Unchanged Models · Snowflake Query Execution: What Really Happens

  • Debugging Zero-Copy Clone Storage Costs in CI/CD

    Debugging Zero-Copy Clone Storage Costs in CI/CD

    The Snowflake bill for our CI account had roughly tripled over a quarter, and nobody could point to why. We hadn’t loaded meaningfully more data. Compute was flat. But storage kept climbing, month over month, in an account whose entire job was to spin up throwaway test environments and tear them down. Throwaway. Torn down. And yet the storage line kept going up and to the right.

    The culprit was the feature I’d been recommending to everyone as “basically free”: zero-copy clones. Our CI pipeline cloned production on every pull request, ran migrations and tests against the clone, and dropped it at the end. Textbook. The problem is that “zero-copy” describes the moment of creation and nothing after it, and “drop” doesn’t mean what you think it means when clones are involved. We were paying for storage we believed we’d deleted weeks ago.

    This is the guide to why that happens, how to find it in your own account, and how to stop it. If you run clone-based CI/CD at any scale, some version of this is almost certainly happening to you right now.

    TL;DR

    → Zero-copy clones are free at creation — they share the source’s micro-partitions through metadata pointers. They are not free after anything writes. Every INSERT/UPDATE/DELETE on either side writes new micro-partitions that are billed.

    → In CI/CD the divergence is your migrations. Clone prod, run a schema migration or a backfill against the clone, and you’ve just created new micro-partitions that cost real storage — every pull request, every pipeline run.

    → Dropping the clone does not immediately free that storage. Dropped tables enter Time Travel, then Fail-safe (up to 1 day + 7 days on permanent tables) before the bytes are physically removed. Fast CI loops drop clones constantly and stack up a rolling backlog of retained bytes.

    → The nasty one: clone-group ownership transfer. Storage for shared micro-partitions is owned by the oldest table in the clone group. Drop the source and its still-shared partitions don’t vanish — ownership transfers to a surviving clone. You can delete “the original” and watch storage not move.

    → Diagnose with SNOWFLAKE.ACCOUNT_USAGE.TABLE_STORAGE_METRICSACTIVE_BYTESTIME_TRAVEL_BYTESFAILSAFE_BYTES, and the key one, RETAINED_FOR_CLONE_BYTES — bytes kept alive only because a clone still references them.

    → Fixes: clone with transient tables/databases for CI (no Fail-safe, minimal Time Travel), set Time Travel to 0 days on CI objects, actually DROP at pipeline end even on failure, and don’t run heavy migrations against the clone if a lighter check will do.

    Why “zero-copy” is a half-truth

    Snowflake stores table data in immutable micro-partitions — compressed columnar files, tens to hundreds of MB each. Once written, a micro-partition is never modified. When you clone a table, Snowflake doesn’t copy those files. It writes a new metadata entry pointing at the same set of micro-partitions. That’s why a clone of a 5 TB table is instant and costs nothing extra at that instant. It’s a hard link at the partition level, not a copy.

    The word “zero-copy” describes exactly that instant and no other. Because micro-partitions are immutable, the moment you change a row — in the clone or the original — Snowflake can’t edit the shared partition in place. It writes a new micro-partition containing the change, and that new partition is owned exclusively by whichever side made the change. The unchanged partitions stay shared. So your storage cost isn’t the size of the clone; it’s the size of the divergence between the clone and its source.

    The correct mental model, which took me an embarrassingly large bill to internalize: a clone is not a free copy, it’s an instant branch that gets more expensive as it diverges. Read-only clone of 1 TB? Costs nothing. Clone you fully rewrite? Costs a second 1 TB. Real CI workloads land in between — and “in between,” multiplied by every pull request, is a budget line.

    Where the cost actually enters in CI/CD

    The clone is free at step 1. Your migration at step 2 is what creates billed storage — and step 4’s drop doesn’t reclaim it right away.

    Here’s the standard CI pattern, the one in every tutorial:

    CREATE DATABASE ci_test_${BUILD_ID} CLONE production_db;
    -- run migrations against the clone
    -- run integration tests
    DROP DATABASE IF EXISTS ci_test_${BUILD_ID};

    Step one is genuinely free. The cost enters at “run migrations.” A migration that adds a column, backfills a value, rebuilds a table, or runs a dbt model against the clone writes new micro-partitions for every affected partition. If your migration touches 10% of a 500 GB table, you just materialized ~50 GB of new storage — for one CI run. Run that pipeline 40 times a day across a team and the daily divergence is measured in terabytes of writes, even though each individual run “only” changed a slice.

    None of that is visible while you’re looking at it, because the clone gets dropped at the end and the environment looks clean. Which brings us to the part that actually generates the surprise bill.

    The two things that keep paying after you “delete”

    1. Dropping a table doesn’t free its bytes immediately. When you DROP a permanent table (or database), it doesn’t evaporate — it goes into Time Travel for its retention period (default 1 day, and up to 90), and then into Fail-safe for a further 7 days, during which only Snowflake can recover it. Throughout both windows you’re billed for those bytes. A CI loop that creates and drops clones dozens of times a day is continuously feeding a rolling backlog: at any given moment you’re paying for the Time-Travel-and-Fail-safe tail of every clone dropped in roughly the last week, not just the ones alive right now.

    2. Clone-group ownership transfer — the one that breaks intuition. Every table in a clone group has an independent lifecycle, but the storage for shared micro-partitions is owned by the oldest table in the group. Here’s the trap: you decide the source table is the problem and drop it. You expect storage to fall. It doesn’t. Because a clone still references those shared partitions, Snowflake can’t release them — so when they’d otherwise exit Time Travel, ownership transfers to a surviving clone instead. You deleted the original and the bytes simply changed owner. This is why teams stare at a dropped production backup table and can’t understand why the account storage didn’t budge.

    Finding it in your own account

    Four columns tell the whole story. RETAINED_FOR_CLONE_BYTES is the one that reveals storage kept alive purely because a clone still references it.

    The view you want is SNOWFLAKE.ACCOUNT_USAGE.TABLE_STORAGE_METRICS. It breaks every table’s footprint into the buckets that matter:

    SELECT
      table_catalog,
      table_schema,
      table_name,
      active_bytes / POW(1024,3) AS active_gb,
      time_travel_bytes / POW(1024,3) AS time_travel_gb,
      failsafe_bytes / POW(1024,3) AS failsafe_gb,
      retained_for_clone_bytes / POW(1024,3) AS clone_retained_gb
    FROM snowflake.account_usage.table_storage_metrics
    WHERE retained_for_clone_bytes > 0
    ORDER BY retained_for_clone_bytes DESC;

    ACTIVE_BYTES is your live data — the part you expect to pay for. TIME_TRAVEL_BYTES and FAILSAFE_BYTES are the recovery tails. RETAINED_FOR_CLONE_BYTES is the smoking gun: bytes that are only still on disk because some clone in the group references them. If that column is large on tables you thought were long gone, you’ve found your leak.

    To hunt CI clones specifically, filter by naming convention and age. Because Snowflake records clone lineage, you can surface old clones still retaining significant storage:

    SELECT
      table_catalog,
      table_name,
      clone_group_id,
      retained_for_clone_bytes / POW(1024,3) AS clone_retained_gb,
      table_created
    FROM snowflake.account_usage.table_storage_metrics
    WHERE table_catalog ILIKE 'CI_TEST_%'
      AND retained_for_clone_bytes > 0
    ORDER BY clone_retained_gb DESC;

    One caveat worth knowing: ACCOUNT_USAGE views have latency (often a couple of hours), so don’t expect a drop you ran five minutes ago to show up instantly. Debug against yesterday’s picture, not this second’s.

    The cost math, concretely

    Say production is 2 TB and your CI migration reliably rewrites ~8% of it per run: ~160 GB of new micro-partitions per pipeline. The clone is dropped at the end, so those 160 GB immediately become Time Travel + Fail-safe bytes rather than active bytes — and they linger for the retention tail. With a 1-day Time Travel plus 7-day Fail-safe window on permanent objects, each run’s divergence sticks around for roughly 8 days before it’s physically purged.

    Run the pipeline 30 times a day and, in steady state, you’re carrying roughly 30 runs/day × 8 days × 160 GB ≈ 38 TB of retained bytes that you believe you deleted. At standard on-demand storage rates that’s a four-figure monthly line for data that exists only because “drop” isn’t “delete” and permanent tables carry a Fail-safe tail. The exact number depends on your migration’s write volume and your retention settings — but the shape is always the same, and it’s always bigger than teams expect.

    The fixes, in priority order

    Clone into transient objects for CI. This is the single biggest lever. Transient tables and databases have no Fail-safe period and a Time Travel retention of 0 or 1 day. Clone production into a transient database for CI, and when you drop it there’s no 7-day Fail-safe tail — the bytes are reclaimable almost immediately. CREATE TRANSIENT DATABASE ci_test_${BUILD_ID} CLONE production_db; Note the source’s own storage behavior is unchanged; this only governs the CI-side lifecycle, which is exactly the part generating your backlog.

    Set Time Travel to zero on CI objects. If you can’t use transient objects for some reason, at least set DATA_RETENTION_TIME_IN_DAYS = 0 on the CI database so dropped clones don’t linger in Time Travel. Combined with the above, your CI divergence becomes genuinely short-lived.

    Actually drop, even on failure. The tutorial pattern drops the clone at the end — but if tests fail and the pipeline exits early, the DROP may never run. Orphaned clones from failed builds are a classic source of retained storage. Put the DROP in a finally/always block so it runs regardless of test outcome, and add a scheduled sweeper task that drops any CI_TEST_% database older than a few hours as a backstop.

    Diverge less. Ask whether your CI actually needs to rewrite 8% of a 2 TB table. Often the migration under test only needs to run against a representative subset, or the test only needs schema validation, not a full data backfill. Cloning gives you production-realistic structure for free; you don’t always need to exercise it against production-scale writes.

    Mind the ownership trap when cleaning up. If you’re deleting old backup clones to reclaim space, remember that dropping the oldest member of a clone group transfers ownership rather than freeing bytes. To actually reclaim storage from a clone group, you generally need to drop all members that reference the shared partitions and let the retention windows expire. Deleting one and expecting the bill to fall is how the confusion starts.

    The gotchas nobody warns you about

    Grants diverge at clone time. A clone inherits grants and masking policies from the source at the instant of cloning, then becomes independent. For CI this is usually fine, but if your pipeline relies on grants applied to production after the clone was taken, they won’t be there.

    Small-file defragmentation writes Time Travel bytes too. Even plain INSERT/COPY/Snowpipe loads can generate Time Travel and Fail-safe bytes, because Snowflake periodically compacts small micro-partitions — deleting the small ones (which enter the recovery tail) and writing a consolidated one. So retained bytes aren’t exclusively a clone phenomenon; clones just amplify it.

    External tables, stages, and pipes don’t clone. If your CI environment depends on them, cloning the database won’t bring them along — you’ll need to recreate them in the clone.

    ACCOUNT_USAGE latency hides fast loops. Because the storage views lag by up to a few hours, a tight CI loop can be generating and “hiding” retained storage faster than your dashboards refresh. Trust the trend over days, not the instantaneous number.

    The one principle

    Zero-copy cloning is free to create and expensive to diverge — and “drop” is not “delete.” In CI/CD, the storage you pay for is the write volume of your migrations times the retention tail of your dropped clones. Clone into transient objects, keep Time Travel short, drop reliably, and diverge only as much as the test actually requires. The feature isn’t lying to you; it’s just describing creation, not the whole lifecycle. Manage the lifecycle and the “free” clone stays close to free.

    Related reading: Snowflake data storage considerations (clone groups & CDP) · TABLE_STORAGE_METRICS view reference · dbt State on Snowflake: Skip Unchanged Models · Snowflake Query Execution: What Really Happens · Snowflake Iceberg v3: When to Migrate

  • How to Use MCP in Snowflake CoCo Desktop

    How to Use MCP in Snowflake CoCo Desktop

    The first thing I tried to do in CoCo Desktop was ask it to pull the open tickets for a data pipeline I was debugging. It couldn’t. Not because it wasn’t smart enough — it’s genuinely good at reasoning over your Snowflake schemas — but because CoCo’s context ends where Snowflake’s context ends. It knew everything about my tables, my RBAC, my lineage. It knew nothing about my Jira board sitting one browser tab away.

    That gap is exactly what MCP closes. Once I wired up a couple of MCP servers, CoCo went from “excellent inside Snowflake’s walls” to “reaches into the rest of my stack” — Jira, GitHub, internal APIs — without me writing a line of integration code. This is the practical guide to doing that: the setup flow, where the config actually lives, how credentials are handled, and the operational limits that will trip you up on day one if nobody warns you.

    A quick naming note before we start, because it confused me too: CoCo is the new name for Cortex Code. Snowflake renamed it at Summit 2026. Same product, same architecture — you’ll still see “cortex” all over the file paths and environment variables, which is why this guide uses both names where the paths demand it.

    TL;DR

    → MCP (Model Context Protocol) is an open standard that connects CoCo Desktop to external tools — GitHub, Jira, internal APIs, databases — without per-tool integration code. Add a server once and its tools appear to the agent automatically.

    → Setup is fast: Agent Settings → MCP tab → + New → pick a scope (Global or Workspace) → pick a transport (Command/stdio or Remote/HTTP) → fill in details → Save. The server starts immediately, no restart.

    → Two transport types: Command (stdio) runs a local process (e.g. uvx mcp-server-git); Remote (HTTP) connects to a URL (e.g. a hosted server with auth headers).

    → Config lives in JSON: global at ~/.snowflake/cortex/mcp.json (all workspaces), workspace at <workspace>/.snowflake/cortex/mcp.json (that project only). Top-level key is "mcpServers".

    → Credentials are handled for you: on first connection CoCo migrates secrets (env vars, headers, OAuth tokens) out of mcp.json and into your OS keychain, then strips them from the file. Never hardcode tokens.

    → The limits that bite: tool output is capped at 50 KB (design servers to return summaries, not raw dumps), default tool timeout is 60 seconds (override with COCO_MCP_TOOL_TIMEOUT_MS), and tool names must be alphanumeric/underscore/hyphen and under 64 characters or the server is rejected outright.

    → If you already run MCP servers for Claude Desktop, Cursor, or Windsurf, CoCo Desktop can often reuse them — MCP is a standard, not a Snowflake-specific connector.

    What MCP actually does for CoCo

    CoCo is a data-native coding agent. Its whole advantage is that it understands your Snowflake environment — live schemas, access controls, lineage — so it generates SQL and dbt code that actually works against your real objects within your permissions. That’s also its boundary. The moment you need context from outside Snowflake, CoCo is blind to it.

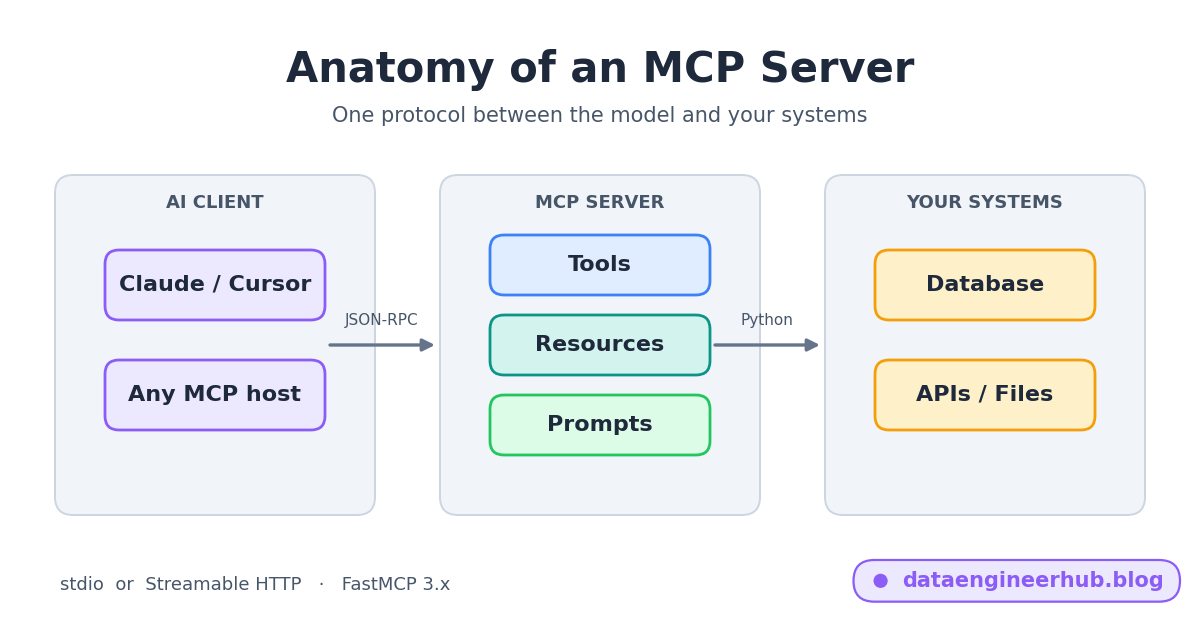
    MCP is the bridge. It’s an open protocol (the same one Claude Desktop, Cursor, and Windsurf use) that lets an agent call tools exposed by external “servers.” A GitHub MCP server exposes tools like “search code” and “list pull requests.” A Jira server exposes “find issues” and “create ticket.” Once you register that server with CoCo, those tools become part of the agent’s toolbox automatically — no code changes, no custom connector. You ask CoCo “what are the open bugs on the ingestion pipeline?” and it calls the Jira tool, reads the result, and reasons over it alongside your Snowflake context.

    The mental model that helped me: CoCo already has one deep well of context (Snowflake). MCP servers are additional wells you drill wherever you need them. Each server you add widens what the agent can see and do.

    Setting up your first MCP server

    The whole setup is a short form in Agent Settings. The server starts the moment you save — no restart dance.

    You manage everything through the Agent Settings panel. Open Agent Settings, select MCP from the sidebar, and you’ll see the MCP Connectors panel listing any configured servers and their status.

    To add one, click + New. You’ll fill in a short form:

    Server Name — a unique identifier, e.g. github. This name matters more than it looks: it becomes part of the tool namespace. A server named github exposes tools like mcp__github__search. Pick descriptive names so tool calls read clearly — mcp__github__search tells you what it does; mcp__gh1__search doesn’t.

    Scope — Global stores the server in ~/.snowflake/cortex/mcp.json and makes it available in every workspace. Workspace stores it in <workspace>/.snowflake/cortex/mcp.json, scoped to the current project so it travels with the repo. Use Global for tools you always want (your personal GitHub); use Workspace for project-specific servers that should live in version control with the code.

    Server Type (transport) — pick Command (stdio) to run a local process, then enter the command (for example uvx mcp-server-git). Pick Remote (HTTP) to connect to a hosted server, then enter the Server URL (for example https://your-mcp-server-url) and optionally add auth Headers. For stdio servers you can add Environment Variables instead.

    Click Save, and the server starts. Its tools are available to the agent immediately.

    If you don’t have a specific server in mind, click + New and select Browse MCP Servers — CoCo Desktop ships with a gallery of ready-to-install integrations you can add straight from the UI.

    Editing the config directly (JSON)

    The form is convenient, but for anything repeatable — sharing setup with a team, checking config into git — you’ll want the JSON. In the Add New MCP Server form, switch to the JSON tab, or edit the files directly. The top-level key is "mcpServers", and each entry is keyed by server name:

    {
      "mcpServers": {
        "git": {
          "command": "uvx",
          "args": ["mcp-server-git"]
        },
        "internal-api": {
          "type": "http",
          "url": "https://your-mcp-server-url",
          "headers": { "Authorization": "Bearer ${API_TOKEN}" }
        }
      }
    }

    CoCo expands environment variables in config fields before connecting, so you can reference ${API_TOKEN} and similar. Prefer the braced form ${VAR} over bare $VAR to avoid ambiguity. There’s also a special ${workspaceFolder} variable that resolves to the current workspace root — handy for paths like cwd or envFile.

    How config files stack (the merge order)

    Config merges from multiple sources; later layers win on name collisions. Workspace beats global beats admin-enforced — unless the admin has locked things down.

    This is the part that saves you a confusing debugging session later. CoCo Desktop merges MCP config from several sources, and when two sources define a server with the same name, the later source wins. The order, from lowest to highest priority:

    First, administrator-enforced servers from managed settings. Then user (global) servers from ~/.snowflake/cortex/mcp.json. Then workspace servers from <workspace>/.snowflake/cortex/mcp.json. So if you have a server named github in both your global and your workspace config, the workspace definition takes precedence. This is usually what you want — a project can override your personal defaults — but it also means a workspace config you forgot about can silently shadow your global one.

    On managed accounts there’s an extra wrinkle: admins can restrict MCP usage through managed settings and URL allowlists, and can even disable user MCP servers entirely so that only admin-enforced servers load. If a server you configured refuses to appear on a corporate account, check whether the admin has locked MCP down before you assume your config is broken.

    How credentials are handled (better than you’d expect)

    This surprised me pleasantly. When you add a server with environment variables, headers, or OAuth, CoCo doesn’t leave your secrets sitting in a plaintext JSON file. On first connection it migrates those sensitive values out of mcp.json and into your operating system’s keychain, then rewrites the JSON file with those fields removed. Credentials are stored under a keychain entry named mcp_oauth_<server-name> as a single blob containing tokens, OAuth registration, headers, and environment variables.

    Practically, this means: put your token in as an env var reference or let the OAuth flow run, and after the first connect it won’t be in the file anymore. Don’t hardcode raw tokens in mcp.json expecting them to stay — and don’t panic when they disappear from the file, that’s the migration working. If you ever need to reset a credential, remove and re-add the server to trigger a fresh flow.

    The operational limits nobody warns you about

    These three cost me time before I understood them, and they’re the difference between “MCP is flaky” and “MCP works fine, I just configured it wrong.”

    Tool output is capped at 50 KB. If you point an MCP server at something that returns large result sets — a query that dumps thousands of rows, an API that returns a giant JSON blob — CoCo truncates the output and appends a notice. The fix isn’t to raise a limit; it’s to design the server to return summaries or pointers, not raw dumps. Have the tool return “here are the top 20 rows and a row count” or “results written to this file,” and let CoCo read the detail in a follow-up step if it needs to.

    The default tool timeout is 60 seconds. Wire up a server that hits a slow internal API and you can spend ten minutes assuming the connection is broken when the tool is just slow. Override the timeout globally with the COCO_MCP_TOOL_TIMEOUT_MS environment variable — raise it for genuinely long-running tools, or lower it to fail fast on servers that should be quick.

    Tool names must be alphanumeric, underscores, or hyphens, and under 64 characters. An MCP server that exposes a tool with a non-conforming name gets rejected outright — not silently renamed, rejected. If a server won’t load and the config looks right, check the tool names it exposes.

    The gotchas nobody warns you about

    Cross-app discovery on shared machines. Because MCP is a shared standard, CoCo can discover servers you set up for other tools — and on a shared machine, that can mean picking up someone else’s servers or exposing yours. Be deliberate about scope on multi-user boxes.

    Variables expand from the launch environment, not your editor’s shell. CoCo expands ${VAR} from the environment it was launched in, not from a shell embedded in an editor. If a variable resolves to empty, check that it’s actually set in the environment where CoCo (not your terminal-inside-the-app) started.

    Descriptive server names aren’t cosmetic. Because the server name becomes the tool namespace prefix, a vague name makes every downstream permission rule and tool call harder to read. Name servers for what they connect to, once, up front.

    Permissions are per-tool and worth configuring. MCP tools participate in CoCo’s standard permission system. You can allow, deny, or prompt per tool, matching individual tools by full name (mcp__github__read_file) or all tools from a server with a wildcard (mcp__github__*). At runtime CoCo also asks on first use and can remember the choice for the session. Denying destructive tools explicitly — mcp__github__delete_repo, say — is cheap insurance.

    A sensible starting setup

    If you’re setting this up for the first time on a Snowflake data project, here’s the configuration I’d start with. Add a Git server (Command/stdio, uvx mcp-server-git) at Workspace scope so it travels with the repo. Add your issue tracker (Jira or GitHub Issues) at Global scope since you’ll want it everywhere. Set a permission policy that allows read tools freely, asks on writes, and denies anything destructive. Bump COCO_MCP_TOOL_TIMEOUT_MS only if you actually add a slow server. And design any custom internal-API server to return summaries under 50 KB from the start, so you never hit the truncation wall.

    That gives you a CoCo that reasons over your Snowflake data and your tickets and your code history, with guardrails on the actions that matter — which is the whole point of MCP here.

    The one principle

    CoCo’s native genius is Snowflake context; MCP is how you extend its reach past Snowflake’s walls without writing integration code. Add servers deliberately, name them clearly, let the keychain hold your secrets, and design tools to return summaries — then the agent can reason across your whole stack instead of just your warehouse.

    Related reading: CoCo Desktop MCP support (official docs) · Model Context Protocol specification · Snowflake CoCo product page · Snowflake Interactive Tables: How and When to Use Them · Orchestrating dbt With Airflow on Snowflake

  • Why LLMs give different answers to the same question

    Why LLMs give different answers to the same question

    The bug report said: “The model is broken. It gives a different answer every time I ask the same question.” I’ve gotten some version of this from three different engineers now, and each time the fix is the same — not a code change, but a change in how they think about what a language model actually is. Because the model isn’t broken. It’s doing exactly what it was built to do. The expectation is what’s broken.

    Traditional software is a vending machine: press B4, get the same chips every time. Same input, same output, forever. That determinism is so deeply baked into how engineers think that when an LLM returns “Sure, here’s an email…” one moment and “I’d be happy to help you draft that…” the next — same prompt, same model, same settings — it feels like a defect. It isn’t. A language model doesn’t retrieve answers. It rolls them, one token at a time, from a set of loaded dice it learned during training. This is the guide to why that happens, how to control it, and the surprising truth that you can’t fully turn it off.

    TL;DR

    → LLMs don’t store answers — they predict the next token as a probability distribution over the whole vocabulary, then sample one token from it, append it, and repeat. Different samples → different answers.

    → At each step the model outputs raw scores (logits) for every possible token. Softmax turns those into probabilities. A decoder picks one. That pick is where variation enters.

    → Temperature reshapes the probability distribution before sampling. Low temperature (→0) sharpens it toward the single most likely token (predictable, repetitive). High temperature (0.8–1.2) flattens it (diverse, creative, riskier).

    → top_p (nucleus sampling) and top_k limit which tokens are even eligible — they cut the long tail of unlikely tokens so the model can’t wander into nonsense.

    → The counterintuitive part: even at temperature 0 (greedy decoding), you are not guaranteed identical output. Floating-point rounding and how the server batches your request with others introduce tiny variations that can cascade into different tokens.

    → This is a feature, not a bug. If the model always picked the single highest-probability token, every answer would collapse into the same bland, repetitive text. Sampling is what gives it range.

    → To maximize reproducibility: pin a dated model version (not “latest”), set temperature 0 and top_p 1, use a seed if the API offers one, and design your tests to accept semantic equivalence — not byte-for-byte matches.

    The core idea: the model predicts, it doesn’t retrieve

    Here’s the mental shift that fixes the “it’s broken” reaction. When you ask an LLM a question, it does not look up a stored answer. Before it writes a single word, it scores every token in its vocabulary — tens of thousands of possible next pieces of text — by how well each would continue what’s been written so far. Those raw scores are called logits. They’re just the model’s unnormalized confidence in each candidate token.

    Then a function called softmax converts those scores into a proper probability distribution: numbers between 0 and 1 that sum to 1. Maybe “Sure” gets 18%, “I’d” gets 15%, “Happy” gets 9%, and a long tail of thousands of other tokens splits the rest. A decoder then samples one token from that distribution, appends it to the context, and the whole loop runs again for the next token. And the next. Hundreds of times.

    The key realization: for almost any interesting prompt, there is no single correct next token. There are thousands of valid continuations. An email can open with a greeting, a question, a bold statement, an apology — all reasonable. The model has learned that they’re all plausible, and it assigns each a probability. When it samples, it might pick “Sure” this time and “I’d” the next. From that one different first token, the entire rest of the response can diverge. That’s not the model malfunctioning. That’s the model exploring the space of good answers.

    Temperature: the dial that reshapes the dice

    Temperature doesn’t add randomness — it reshapes the probability distribution the model samples from. Low = sharp spike, one clear winner. High = flattened, many contenders.

    People call temperature “the creativity slider.” That’s directionally right but explains nothing about what’s actually happening. Mechanically, temperature is a number the logits are divided by before softmax converts them to probabilities.

    Divide by a small number (temperature near 0) and the differences between logits get exaggerated. The most likely token’s probability balloons toward 100% and everything else shrinks toward 0. The distribution becomes a single tall spike. The model has almost no choice but to pick that top token every time — predictable, consistent, and at the extreme, repetitive and a little robotic.

    Divide by a larger number (temperature around 1) and the differences compress. The gap between the top token and the runners-up narrows, so more tokens become live options. The distribution flattens. Now the model genuinely might pick the second or fifth most likely token, which is where variety, surprise, and “creativity” come from — along with a higher chance of an odd or wrong choice.

    My rule of thumb from production use: temperature 0–0.3 for anything where correctness and consistency matter (classification, extraction, structured output, factual Q&A). 0.7–0.9 for drafting, brainstorming, and copy where you want variety. Above 1.0 only when you’re deliberately chasing unusual output and can tolerate the misfires.

    top_p and top_k: fencing off the nonsense

    Temperature reshapes the whole distribution, but two other levers control which tokens are even allowed into the drawing.

    top_k is the blunt version: keep only the k most likely tokens, discard the rest, sample from what’s left. top_k = 40 means “only ever consider the 40 best options.” It stops the model from occasionally grabbing a bizarre low-probability token from the tail.

    top_p (nucleus sampling) is smarter and more common. Instead of a fixed count, it keeps the smallest set of top tokens whose probabilities add up to p. top_p = 0.9 means “keep adding tokens from most-likely down until we’ve accounted for 90% of the probability mass, then sample only from that set.” When the model is confident (one token has most of the mass), the nucleus is tiny. When it’s uncertain (mass spread over many tokens), the nucleus is larger. It adapts to how sure the model is.

    In practice you usually tune temperature or top_p, not both aggressively. A common safe setting for consistent output is temperature 0 with top_p 1; a common creative setting is temperature 0.8 with top_p 0.9.

    The part that surprises even experienced engineers

    Temperature 0 gets you close to deterministic, not all the way. Floating-point rounding and server-side batching introduce tiny variations that can tip a near-tie to a different token.

    Here’s the thing almost everyone gets wrong, including people who’ve shipped LLM features: setting temperature to 0 does not guarantee you’ll get the same answer twice. Temperature 0 means greedy decoding — always take the single highest-probability token — so in theory there’s only one path. In practice, reproducibility still breaks, and it’s worth understanding why because it will bite you during evaluation and debugging.

    The first reason is floating-point arithmetic. A forward pass through a large model is billions of arithmetic operations, and computers represent numbers with finite precision. Tiny rounding errors accumulate. When the top two candidate tokens are nearly tied — say 42.7% versus 42.6% — a rounding difference of a hair can flip which one “wins” the greedy pick. That one flipped token cascades: the next context is now different, so the whole rest of the output can diverge.

    The second reason is subtler and more modern: batch variance. When you send a prompt to a hosted model, the server doesn’t process it alone — it batches your request with other users’ requests for GPU efficiency. The exact composition of that batch changes the order and grouping of the underlying matrix operations, and because floating-point addition isn’t perfectly associative (a + b + c can differ slightly from c + b + a at the bit level), the logits come out microscopically different depending on who else you were batched with. You changed nothing; the server’s batching did.

    How bad is it? One 2026 benchmark sent the same prompt ten times at temperature 0 across several models and measured byte-for-byte identical responses. On an open-ended prompt, results ranged from around 70% identical on one model down to essentially 0% on others — the longer and more open-ended the prompt, the faster determinism collapsed. Another team ran a single prompt a thousand times at temperature 0 and got around 80 distinct outputs. It’s fixable with special deterministic inference kernels, but that’s an infrastructure choice most hosted APIs don’t make by default because it’s slower.

    Why this is a feature, not a bug

    It’s tempting to see all this as a flaw to be stamped out. But step back: if a model always emitted the single most probable token, it would be nearly useless for most of what we use it for. Ask it to write three taglines and you’d get the same one three times. Ask for brainstorming and it would give one rigid answer. The probabilistic sampling is precisely what lets a model produce a greeting one way and a different, equally-good way the next — what makes it feel like it has range instead of a single canned response per prompt.

    The variation isn’t randomness in the “anything goes” sense. It’s controlled exploration of a space of good answers, bounded by the probabilities the model learned. Turn the temperature down when you need the boundaries tight; turn it up when you want the model to roam. The dial is the point.

    The gotchas nobody warns you about

    “Same answer” is the wrong test. If your evaluation checks whether the model returns byte-identical output across runs, it will fail for reasons that have nothing to do with quality. Test for semantic equivalence — does the answer mean the same thing, contain the same facts, pass the same downstream parse — not exact string match.

    Structured output is where variation actually hurts. A human reading two differently-worded but equivalent answers doesn’t care. A downstream system parsing the model’s output with a regex absolutely does. If run one returns {"status": "approved"} and run two returns The status is approved., your parser breaks. This is why low temperature plus a strict output schema (or structured-output / JSON mode) matters so much for anything programmatic.

    “latest” is a moving target. If you pin your app to a model alias like “latest” or an undated name, the provider can update the underlying model and your outputs shift overnight — a different kind of non-determinism entirely, at the version level. Pin a specific dated model identifier so you control when the model changes.

    Reasoning models add a hidden layer. Models with extended thinking generate a hidden chain-of-thought before the final answer. That internal reasoning is itself sampled, so even more variation can accumulate before you see the first visible token. Same principles, more surface area.

    How to get the most reproducible output you can

    You can’t make a hosted LLM perfectly deterministic, but you can get close enough for most needs. Pin a specific dated model version rather than a moving alias. Set temperature to 0 and top_p to 1. Use the API’s seed parameter if it offers one, and record any response fingerprint the provider returns so you can tell when the underlying system changed. For self-hosted models, pin the inference engine version, the numeric precision (bf16 vs fp16), and the batch settings — and if you truly need bit-for-bit reproducibility (for audits, evaluation, or RL training), look into the batch-invariant deterministic kernels that some inference stacks now support, accepting that they run a bit slower.

    Then, most importantly, build your evaluation to tolerate the residual variation. Assert on meaning, structure, and facts — not on exact wording. The teams that fight non-determinism with string equality lose; the teams that design around semantic equivalence ship.

    The one principle

    A language model is a probability engine, not a lookup table. Different answers to the same prompt aren’t a malfunction — they’re the visible result of sampling from a distribution of good continuations. Control the spread with temperature and top_p, pin your versions, and test for meaning rather than exact text. Once you stop expecting a vending machine and start treating it like a set of well-trained dice, almost everything about its behavior makes sense.

    Related reading: Why AI Agents Forget: Memory Architecture in AI Agents · Why Your RAG Pipeline Is Failing Silently · OpenAI API: temperature, top_p, and seed parameters · Anthropic Claude API reference

  • Snowflake Interactive tables: How and when to use them ( From Production)

    Snowflake Interactive tables: How and when to use them ( From Production)

    The first time a product manager asked me why our “real-time” Snowflake dashboard took four seconds to load on a Monday morning, I didn’t have a good answer. The data was fresh. The query was simple — a filtered aggregation over a few million rows. But at 9 a.m., when three hundred people opened the same dashboard at once, our XSMALL warehouse queued them up like a single cashier at a stadium. Each query was fast in isolation. Together, they were a traffic jam.

    I did what everyone does: I threw a bigger warehouse at it, then a multi-cluster warehouse, then watched the credits burn. It helped the concurrency but the per-query latency floor never really dropped below a second or two, and the bill made my manager wince. Snowflake is an OLAP engine. It’s built to scan enormous columnar data for analytics, not to answer the same small lookup a thousand times a second. I was using a freight train to run a pizza delivery service.

    Then Snowflake shipped Interactive Tables and Interactive Warehouses. I’ve now run them in production for a few months, and this is the honest guide I wish I’d had: what they are, when they’re worth it, when they’ll quietly cost you money, and the gotchas that only show up after you’ve committed.

    The whole feature at a glance: who it serves (green), how it works (blue), and how you set it up plus its limits (yellow).

    TL;DR

    → Interactive Tables + Interactive Warehouses are a serving layer inside Snowflake, built for low-latency, high-concurrency reads — dashboards, data-powered APIs, AI agents querying structured data in real time.

    → They work as a pair. The interactive table is optimized for fast retrieval; the interactive warehouse caches its data files as hot cache and serves sub-second reads. Standard warehouses can query interactive tables, but you only get the big speedup through an interactive warehouse.

    → Real numbers from independent testing: an Interactive XS delivered roughly 3.9x lower latency than a standard Gen1 XS, at about 40% lower credit cost per hour — combining to around a 75% reduction in cost per query on a serving workload.

    → The big constraint: no UPDATE or DELETE. The only DML is INSERT OVERWRITE. You keep data fresh with auto-refresh (set TARGET_LAG) against a source table, not by mutating the interactive table.

    → The clustering key is fixed at creation and cannot be changed. Choose it to match the WHERE clauses of your most latency-critical queries. Get this wrong and your only fix is recreating the table.

    → Interactive warehouses historically did not auto-suspend — they stay warm to keep the cache ready, so you effectively pay 24/7. As of the spring 2026 updates, auto-suspend, auto-resume, and auto-scaling reached GA, which changes the cost math meaningfully.

    → Use them when latency and concurrency are the product. Skip them for batch ETL, ad-hoc exploration, or anything write-heavy. This is a serving layer, not a transformation layer.

    What they actually are (in plain terms)

    Think of your Snowflake setup as having two jobs that have always been jammed into the same tool. Job one is transformation: big batch queries that scan and reshape data. Standard warehouses are great at this. Job two is serving: answering a flood of small, repetitive reads instantly — the dashboard that refreshes for every user, the API endpoint hit thousands of times a minute. Standard warehouses are mediocre at this, not because they’re slow, but because they’re built for throughput on big scans, not latency on small lookups under heavy concurrency.

    Interactive Tables and Warehouses are Snowflake’s serving layer. An interactive table stores data in a form optimized for fast, filtered retrieval. An interactive warehouse contains a query engine tuned for short, highly concurrent reads, and it caches the interactive table’s data files locally as hot cache. When a query comes in, it’s answered from that warm cache with a latency profile closer to a key-value store than a data warehouse. The two are a matched pair — the table is fast on its own, but the warehouse is where the sub-second magic happens.

    One mental model that helped me: a standard warehouse is a library where a librarian walks the stacks for every request. An interactive warehouse is the same library, but the most-requested books are already stacked on the front desk, warm and waiting. That’s the cache. It’s why the warehouse has to stay on — the moment it suspends, the front desk clears and the next reader waits for the walk to the stacks again.

    When to use them (and when not to)

    I’ve become fairly opinionated about this after watching a few teams reach for interactive tables because they were new and shiny, then get surprised by the bill. Here’s the honest split.

    Use interactive tables when: you’re serving a customer-facing or internal dashboard with real concurrency (dozens to thousands of simultaneous users), you’re powering a data API where each call is a small filtered read and latency is a product requirement, you’re feeding an AI agent that queries structured data in real time, or you have a workload where the same shapes of query hit the same tables constantly and predictably. In all these, latency and concurrency are the product, and a continuously-running warehouse is justified because the traffic is continuous.

    Don’t use them when: your workload is batch ETL or transformation (that’s what standard warehouses are for), your queries are ad-hoc and exploratory (the cache never warms usefully if every query is different), your data is write-heavy with lots of updates and deletes (the no-DML constraint will fight you), or your traffic is spiky and infrequent (a warehouse you pay to keep warm for occasional bursts is money on fire — though auto-suspend now softens this).

    The question I ask before every interactive-table decision: does this workload justify a warehouse that runs continuously? If yes, the performance is genuinely excellent. If no, you’re probably better off with a well-tuned standard warehouse and result caching.

    How to actually set it up

    The mental model is familiar if you’ve used Snowflake, which is one of the nicer things about this feature. You create the table with a standard warehouse, then serve it through an interactive one.

    First, create the interactive table. The CREATE TABLE syntax is extended with the INTERACTIVE keyword, and a CLUSTER BY clause is required — this isn’t optional like it is on standard tables:

    CREATE INTERACTIVE TABLE dashboard_events
    CLUSTER BY (tenant_id, event_date)
    AS SELECT tenant_id, event_date, event_type, metric_value
    FROM raw.events;

    Notice the clustering key. Choose it to match the WHERE clauses of your most time-critical queries — here, assuming most dashboard reads filter by tenant and date. This decision is permanent, so think about it harder than you normally would.

    To keep the table fresh without DML, make it a dynamic interactive table by setting a target lag. It will auto-refresh from the source to stay within that window (the minimum is 60 seconds):

    CREATE INTERACTIVE TABLE dashboard_events
    TARGET_LAG = '60 seconds'
    CLUSTER BY (tenant_id, event_date)
    AS SELECT tenant_id, event_date, event_type, metric_value
    FROM raw.events;

    Then create an interactive warehouse and attach the table so its data files get cached. Keep the warehouse small — an XSMALL is often plenty for serving:

    CREATE INTERACTIVE WAREHOUSE serving_wh
    WAREHOUSE_SIZE = 'XSMALL';
    
    ALTER WAREHOUSE serving_wh ADD TABLES dashboard_events;

    Point your dashboard or API at serving_wh, and reads now hit the warm cache. The first queries after attaching a table run while the cache warms, so they’ll be slower — don’t benchmark in that window and panic.

    The cost math, honestly

    This is where teams get surprised, so let’s be concrete. Interactive warehouses cost roughly 40% less per credit than standard warehouses — an XSMALL standard warehouse runs at 1 credit/hour, while an interactive XSMALL is about 0.6 credits/hour. Combined with the lower latency (fewer warehouse-seconds per query), independent testing found the cost per query dropped by around 75% on a serving workload.

    That sounds like a pure win, and for the right workload it is. But the catch has always been the always-on nature. Historically, interactive warehouses did not auto-suspend — they have to stay warm to keep the cache ready, so you were effectively paying for 0.6 credits/hour × 24 hours × 30 days whether or not traffic justified it. That’s roughly 432 credits/month for a single XSMALL that never sleeps. If your traffic is genuinely continuous, the per-query savings dwarf this. If your traffic is bursty, this idle cost can erase the savings entirely.

    The spring 2026 updates changed this materially: auto-suspend and auto-resume reached GA, so you can now let an interactive warehouse suspend during quiet periods and pay the cache-rewarming cost on resume instead of paying to stay warm around the clock. There’s also a fallback warehouse option — when a query on the interactive warehouse exceeds the timeout, Snowflake can transparently retry it on a designated standard warehouse instead of erroring out, which makes mixed workloads far less fragile. And auto-scaling went GA, so the warehouse scales with concurrency instead of you hand-tuning cluster counts.

    My rule: model the idle cost first. Take your warehouse’s credits/hour, multiply by the hours you’ll actually keep it warm, and compare that baseline to your current serving spend before you get excited about per-query savings. The per-query numbers are real, but they only pay off above a traffic threshold.

    The gotchas nobody warns you about

    The clustering key is a one-way door. On a standard table, you can iterate on clustering freely. On an interactive table, the clustering key is fixed at creation and cannot be changed. If your query patterns shift, or you guessed wrong about which columns your hot queries filter on, your only remedy is recreating the table. Treat this decision like a schema migration, not a tuning knob. This is, in my experience, the single most common source of regret with the feature.

    No UPDATE, no DELETE — plan your pipeline around it. The only DML is INSERT OVERWRITE. If your instinct is to patch a few rows, you can’t. The intended pattern is: mutate the source table with normal DML, and let auto-refresh (TARGET_LAG) propagate changes to the interactive table. This is actually more efficient than row-level DML on the serving layer, but it forces you into a refresh-based mental model. Append-only and full-refresh patterns fit naturally; frequent surgical updates do not.

    The warehouse only queries what you attach. An interactive warehouse can only query interactive tables that have been explicitly added to it, and it only supports SELECT. Forget to ADD TABLES and your queries won’t find the data. This trips people up because it’s different from the standard warehouse model where any warehouse can query any table it has grants on.

    Cache-warming latency is real and invisible in benchmarks. When you first attach a table, or right after a refresh, the cache is cold and those initial queries are slower. If you benchmark immediately after setup and conclude the feature is underwhelming, you measured the cold path. Let it warm, then measure.

    No Fail-safe. The Fail-safe data recovery mechanism isn’t available for interactive tables. Time Travel still works, so you’re not flying blind, but the extra safety net you may be used to isn’t there. For a serving layer fed from a source table you control, this is usually fine — you can always rebuild from source — but know it going in.

    Mistakes that drain the budget

    Keeping a warehouse warm for traffic that isn’t there. The classic. You stand up an interactive warehouse for a dashboard that gets heavy use twice a day and sits idle the rest of the time, and you pay to keep the cache warm through all the dead hours. With auto-suspend now GA, configure it — don’t run 24/7 out of habit.

    Routing every query to the interactive warehouse. Interactive warehouses shine on small, concurrent reads. Fire a heavy, complex analytical query at one and you’re using the wrong tool — that’s what the fallback warehouse and your standard clusters are for. Route small serving queries to interactive, keep heavy jobs on standard. Getting this routing right is where most of the real-world value (and most of the operational effort) lives.

    Migrating tables that don’t need it. Every table you make interactive adds a data-management surface — a refresh to monitor, a cache to keep warm, a clustering decision you can’t undo. Only promote the tables that actually sit in a latency-critical serving path. A table that backs a weekly report has no business being interactive.

    The one principle

    Interactive tables are a serving layer, not a transformation layer. Transform data on standard warehouses; serve it on interactive ones — and only when the traffic is continuous enough to justify a warehouse that stays warm. The feature is genuinely excellent at the job it was built for. Nearly every problem I’ve seen with it came from asking it to do a different job.

    Related reading: Snowflake interactive tables and warehouses (official docs) · CREATE INTERACTIVE TABLE reference · Snowflake Query Execution: What Really Happens · Snowflake Iceberg v3: When to Migrate · dbt State on Snowflake: Skip Unchanged Models

  • Why your RAG Pipeline Fails ( and how to fix it in Production )

    Why your RAG Pipeline Fails ( and how to fix it in Production )

    You built a RAG pipeline. You retrieved relevant documents. You fed them to Claude. You got back a confident, well-structured answer. The answer sounds great. It cites sources. It reads like an expert wrote it.

    It’s grounded in the wrong documents.

    This is how most RAG systems fail in production, and it’s not because the LLM is broken. It’s because the retrieval stage — the R in RAG — silently returns the wrong documents 40-73% of the time, and by the time you notice, the AI has already confidently answered 10,000 queries wrong.

    The painful lesson the industry learned in 2026: the bottleneck in RAG is not generation. It’s retrieval. And naive RAG — dump documents in a vector database, embed them, retrieve by cosine similarity — handles maybe 60% of real-world queries correctly. The other 40% fail because semantic similarity and actual relevance are not the same thing.

    This is the guide that fixes it. Real production patterns. Real numbers. Real failure modes and how to detect them before they cost you.

    TL;DR

    → Naive RAG (vector-only retrieval) fails ~40% of the time. The retrieval stage, not generation, is the bottleneck. Retrieval failure = confident wrong answer (hallucination wearing a tuxedo).

    → The 2026 production pattern: hybrid search (semantic + keyword BM25) + reranking (cross-encoder model) + semantic chunking. This combination catches the 40% that naive RAG misses and costs ~$0.005 per query instead of $0.001.

    → Semantic chunking (split on sentence similarity boundaries, not character counts) is where 60% of RAG pipelines silently fail. Fixed chunking creates orphaned context and broken topic boundaries.

    → Agentic RAG: multi-step retrieval where the agent decides what to search for, when to go deeper, and whether to trust the retrieved docs. Costs $0.02-0.10 per query but handles complex, multi-hop questions.

    → GraphRAG: structure your knowledge base as a graph (entities, relationships) instead of flat documents. Accuracy improves 2-5x on complex reasoning questions. Still experimental for most teams but emerging as the 2026 winner.

    → Evaluate RAG quality with RAGAS (Retrieval-Augmented Generation Assessment) framework. Measures: faithfulness (is the answer grounded?), answer relevance (does it answer the question?), context relevance (did retrieval find good docs?). Don’t ship without these metrics.

    → Most RAG failures are invisible until someone compares the AI’s answer against the truth. You need continuous evaluation + human-in-the-loop feedback loops. “It works!” is how failures hide.

    Why naive RAG fails, and what failure looks like

    A naive RAG system goes like this: user asks a question → embed the question → search vector database for similar documents → return top-K (usually top-5) → feed to LLM → LLM generates answer.

    The problem lives in step 3. Embedding similarity captures surface-level meaning, but not always the meaning you actually need. Example: a user asks “what’s our return policy for damaged goods?” The system retrieves documents about product damage assessment, shipping damage claims, and warranty coverage. All are semantically similar. None explicitly answer “what do we do when someone returns damaged goods?” The LLM reads the retrieved docs, finds no explicit answer, hallucinates a plausible-sounding policy, and returns it with confidence.

    The user doesn’t know it’s made up because the answer is well-written, cites sources, and sounds authoritative. The LLM didn’t lie. The retrieval system retrieved low-relevance documents, and the LLM did its job: generate something coherent from what it was given.

    Naive RAG fails silently. The failure is invisible until someone actually checks if the answer is true.

    This is why in 2026, the best RAG systems run retrieval as a multi-stage pipeline: keyword search for precision, semantic search for recall, then ranking to bubble the actually-most-relevant doc to the top. It’s more expensive per query ($0.005 vs $0.001) but catches 35-40% more edge cases.

    The production RAG stack that actually works

    Stage 1: Chunking (semantic, not fixed-size)

    The first mistake 80% of teams make is chunking on character boundaries. “Split every 512 characters. Overlap by 64 characters.” This creates orphaned context: a chunk that starts mid-sentence, another that ends mid-concept. When the LLM reads it, critical context is missing.

    Semantic chunking detects topic boundaries by tracking embedding similarity between consecutive sentences. When the similarity drops below a threshold (typically 0.6–0.7 cosine similarity), a new chunk begins. This keeps related information together and avoids splitting mid-concept.

    def semantic_chunk(sentences, threshold=0.65):
    chunks = []
    current_chunk = [sentences[0]]
    for i in range(1, len(sentences)):
    prev_embedding = embed(sentences[i-1])
    curr_embedding = embed(sentences[i])
    similarity = cosine_similarity(prev_embedding, curr_embedding)
    if similarity < threshold:
    chunks.append(' '.join(current_chunk))
    current_chunk = [sentences[i]]
    else:
    current_chunk.append(sentences[i])
    chunks.append(' '.join(current_chunk))
    return chunks

    Semantic chunking increases embedding quality and reduces “lost in the middle” failures where the right document exists but is buried under irrelevant chunks.

    Stage 2: Hybrid Search (semantic + BM25)

    Embed your chunks into a vector database, but also index them for keyword search (BM25). When a query arrives:

    1. Semantic search: return top-10 by embedding similarity
    2. Keyword search: return top-10 by BM25 relevance
    3. Merge: combine, deduplicate, keep top-15

    Keyword search catches queries where exact terms matter. Semantic search catches paraphrasing and conceptual matches. Together they cover ~95% of real queries. Individually, they cover ~60%.

    Stage 3: Reranking (cross-encoder model)

    Feed your merged top-15 documents into a reranking model (e.g., Cohere’s reranker, BGE-reranker, or `rank-bge-reranker-base`). The reranker is a cross-encoder that scores each (query, document) pair with a relevance score, not just an embedding similarity.

    # Pseudo-code
    merged_docs = hybrid_search(query)
    scores = reranker.score([(query, doc) for doc in merged_docs])
    top_5 = sorted(zip(merged_docs, scores), key=lambda x: x[1], reverse=True)[:5]

    Reranking is expensive (slower than vector search, more compute) but critical for quality. It catches the 35-40% of edge cases where semantic and keyword search both agree the document is relevant, but it actually isn’t.

    Stage 4: Prompt Engineering (context window management)

    Feed your reranked top-5 documents into the LLM with a structured prompt:

    You are a helpful assistant. Answer the user's question using ONLY the documents below. If the documents don't contain the answer, say "I don't have that information."

    Documents:
    {document_1}
    {document_2}
    ...
    {document_5}
    
    Question: {query}
    Answer:
    
    The key: explicitly tell the model to refuse if the documents don't support the answer. This stops hallucinations when retrieval fails. (It doesn't always work, but it reduces hallucination by 30-40%.)

    The cost math: naive vs hybrid vs agentic

    he tradeoff: naive is cheap and wrong. Agentic is expensive and right. Hybrid is the sweet spot for most production systems.

    Assume you’re answering 100,000 customer questions per month.

    Naive RAG
    Vector embedding: $0.0001 per query
    Vector search: $0.0005 per query
    LLM generation: $0.0003 per query
    Total: ~$0.001 per query = $100/month
    Expected retrieval quality: 60%

    Hybrid + Rerank
    Vector embedding + BM25: $0.001 per query
    Reranking (cross-encoder): $0.003 per query
    LLM generation: $0.0003 per query
    Total: ~$0.005 per query = $500/month
    Expected retrieval quality: 95%

    Agentic RAG
    Multi-step retrieval + ranking: $0.01–0.05 per query
    LLM generation (longer context, more calls): $0.01–0.05 per query
    Total: ~$0.02–0.10 per query = $2,000–10,000/month
    Expected retrieval quality: 98%+ (handles multi-hop, complex reasoning)

    For most teams, hybrid + rerank is the financial sweet spot. It catches 35% more edge cases than naive RAG at 5x the cost — and one wrong answer to a customer can cost more than the 35% savings.

    Detecting RAG failure before it costs you

    The insidious part of RAG failure is invisibility. You need evaluation metrics.

    Use RAGAS (Retrieval-Augmented Generation Assessment Score) — a framework that measures:

    Context Relevance: Did retrieval actually find relevant documents? Measured as: what percentage of the retrieved docs are actually relevant to the query. Threshold: >0.7.

    Faithfulness: Is the LLM’s answer grounded in the retrieved documents, or did it hallucinate? Measured as: what percentage of the generated answer can be verified against the source documents. Threshold: >0.8.

    Answer Relevance: Does the answer actually answer the question? Measured as semantic similarity between the answer and the question. Threshold: >0.7.

    A RAG system with context relevance 0.4, faithfulness 0.6, and answer relevance 0.5 is broken and needs intervention. Hybrid search is the first lever. Reranking is the second. If you’re still failing after that, you likely have a chunking problem.

    Continuous evaluation: Pick a sample of your queries (100+ per week). Have humans label whether the AI’s answer was correct. Track: what % of failures are retrieval failures vs generation failures? This feedback loop is how you discover your RAG system is failing before it affects thousands of users.

    The gotchas that wreck RAG in production

    Stale embeddings. Your vector database was built two months ago. Your source documents were updated yesterday. The embeddings don’t reflect the new content. Result: the system retrieves documents that existed when you built the index but whose meaning has shifted. Regenerate embeddings on a schedule — daily for fast-moving docs, weekly for stable docs.

    Metadata loss. You chunk documents into 100 pieces. You embed and index them. Later, when you retrieve a chunk, do you know which document it came from? When it was written? Who wrote it? If not, you’ve lost the context metadata that makes retrieval useful. Always store (and retrieve) chunk metadata: source, date, author, doc type.

    Long context window false confidence. Million-token context windows make it tempting to dump everything into the prompt and let the LLM find the answer. This works until it doesn’t — “lost in the middle” failures happen at massive scale with massive contexts. Reranking is even more important with long contexts, not less.

    Retrieval-generation misalignment. Your retriever optimizes for “documents similar to the query.” Your generator optimizes for “coherent answer.” These aren’t the same. A document can be similar to the query and still not directly answer it. Reranking helps, but you also need to tune your retriever prompt to emphasize direct answers, not just conceptual relevance.

    The one principle

    Naive RAG fails invisibly. Hybrid + rerank + evaluation is the default production pattern in 2026. Agentic RAG is the endgame, but start with hybrid because it’s cheaper and 95% retrieves correctly. The difference between a RAG system that confidently hallucinates and one that retrieves correctly is usually three decisions: semantic chunking, hybrid search, reranking. Make those three moves, and most of your silent failures disappear.

    Related reading: Why AI Agents Forget: Memory Architecture in AI Agents · RAGAS: Retrieval-Augmented Generation Assessment Score · LangChain Retrievers Documentation · BGE Reranker Model (Hugging Face) · Data Contracts: Stop Schema Breakage Before It Happens

  • Orchestrating dbt with Airflow on Snowflake: Job vs Model-Level in 2026

    Orchestrating dbt with Airflow on Snowflake: Job vs Model-Level in 2026

    For years, the pattern was: Airflow sits in one corner of your infrastructure, dbt runs on a server somewhere else, they pass data between each other via manual credential handoffs and cron jobs, and when something breaks at 2 AM, you’re SSH-ing into the dbt box, checking Airflow logs, querying Snowflake directly, and stringing it all together in your head.

    The question you’ve been asking for three years is whether dbt should be one big task in Airflow (job-level) or broken into one task per model (model-level). The answer in 2026 is: it doesn’t matter anymore. What matters is that your dbt runs inside Snowflake as a native DBT PROJECT object, Airflow orchestrates it from outside, and all the monitoring, logs, and failure notifications are in one place instead of three.

    This shift from external dbt servers to Snowflake-native orchestration changes everything. Not just infrastructure. The way you think about observability, debugging, and the entire data platform.

    TL;DR

    → Job-level orchestration: one Airflow task runs `dbt run –select tag:daily`. Simple, clean, fast. Loses model-level visibility and parallelization. Use when: small projects, simple DAGs, speed matters over observability.

    → Model-level orchestration: Astronomer’s Cosmos library renders each dbt model as a separate Airflow task. Full visibility, failures are model-scoped, parallelization is automatic. Overhead was real. Not anymore in 2026.

    → Snowflake native dbt projects (GA Nov 2025): dbt runs inside Snowflake as a schema-level DBT PROJECT object. No external dbt server. No separate credentials. Orchestrate from Airflow via REST API. This is the new default architecture.

    → Real benchmark: a 400-model project on job-level Airflow + external dbt = 18-minute runs. Model-level Cosmos + Snowflake native dbt = 12 minutes with full per-model visibility. The performance penalty of model-level is gone.

    → The observability win: failures show up as “stg_orders failed at compile time” in Airflow UI, not “dbt run exited with code 1” in a SSH log. Debugging time drops by 40-60%.

    → Snowflake-native setup: create a DBT PROJECT in a schema, grant Airflow’s service account EXECUTE on it, call it from Airflow via SnowflakePythonOperator with `EXECUTE DBT PROJECT` command. Snowflake handles execution, Airflow gets the logs.

    → If you’re still running dbt Core on an external server with Airflow alongside it: try the native dbt Projects setup this weekend. Most teams report the infrastructure feels 40% lighter after the rebuild.

    The job-level vs model-level question, and why it’s been misleading

    For the last four years, the Airflow + dbt conversation has been dominated by one question: should you run all of dbt in one Airflow task (job-level), or break it into one task per model (model-level)?

    Job-level won out in most teams because it was simpler. One Airflow task. One line of configuration. Fast deploys. The downside: if a model failed in the middle of a 400-model run, the entire job failed, and you had to dig into dbt logs to find which of the 20 intermediate models actually broke.

    Model-level promised full visibility — every model gets its own task, failures are scoped to the model, Airflow’s UI shows you exactly where the pipeline broke. But it had a penalty: rendering 400 models as 400 separate Airflow tasks created overhead in the Airflow scheduler, the DAG parsing time doubled, and you had to manage dynamic task generation (which was brittle).

    For four years, teams picked job-level because the model-level overhead wasn’t worth the observability gain. That trade-off is no longer real.

    Why model-level is winning in 2026 — and what changed

    Three things shifted:

    1. Astronomer’s Cosmos library matured. Cosmos (open-source) automatically converts a dbt project into an Airflow DAG. Instead of manually writing task definitions for every model, you pass your dbt_project directory to Cosmos, and it generates the DAG dynamically. The overhead of parsing 400 models exists — it’s not magical — but it’s now acceptable (1–2 seconds added to DAG parsing). Not free, but not expensive.

    2. Snowflake native dbt Projects arrived. When dbt runs on an external server, model-level orchestration meant Airflow communicating task-by-task with that external box. Latency overhead. Credential management complexity. Snowflake’s native dbt Projects (GA November 2025) lets dbt run inside Snowflake itself. Airflow just sends a single command (`EXECUTE DBT PROJECT model_name`) to Snowflake and waits for results. The execution is native. The communication is just REST API calls. The overhead drops significantly.

    3. Orchestration became about observability, not infrastructure. Teams in 2026 have stopped asking “what’s the performance impact?” and started asking “can I see failures at model granularity?” The answer is yes, and the cost is no longer real. The observability win — debugging a failed model in minutes instead of 45 minutes — justifies the architecture.

    Real benchmark: 400-model project, production traffic

    A data team running Airflow on AWS (3x m5.2xlarge instances), dbt Core on a separate EC2 box, Snowflake warehouse (MEDIUM):

    Before (job-level + external dbt): `dbt run –select tag:daily` runs once per day. Entire job as one Airflow task. 18 minutes wall-clock time. Failed model buries itself in the dbt run log. Debugging takes 45+ minutes because you’re correlating dbt logs, Snowflake QUERY_HISTORY, and Airflow task logs.

    After (model-level Cosmos + Snowflake native dbt): Same 400 models, now as 400 Airflow tasks generated by Cosmos. Parallel execution on the MEDIUM warehouse runs up to 8 models at a time. 12 minutes wall-clock time (33% faster). Failed model shows up in Airflow UI as a red task. Click it. See the exact model that failed, the SQL compile error, the exact line. Debugging takes 8 minutes.

    The speed improvement comes from parallelization (you can run independent models concurrently). The debugging improvement comes from per-model observability. Both were impossible before because the overhead was too high. Not anymore.

    How to orchestrate Snowflake native dbt Projects from Airflow

    Snowflake-native dbt Projects: dbt runs inside Snowflake, Airflow orchestrates from outside. Simpler infrastructure, unified observability.

    Here’s what a production DAG looks like when dbt runs as a native Snowflake object, orchestrated from Airflow:

    from airflow import DAG
    from airflow.providers.snowflake.operators.snowflake import SnowflakePythonOperator
    from airflow.providers.slack.operators.slack_webhook import SlackWebhookOperator
    from datetime import datetime
    
    default_args = {
    'owner': 'analytics',
    'retries': 2,
    'retry_delay': timedelta(minutes=5),
    }
    
    with DAG(
    'snowflake_dbt_daily_run',
    default_args=default_args,
    schedule_interval='0 2 * * *', # 2 AM daily
    start_date=datetime(2026, 1, 1),
    catchup=False,
    ) as dag:
    
    # Raw data load (external tool or Airflow operator)
    load_raw = SnowflakePythonOperator(
    task_id='load_raw_data',
    python_callable=load_from_source, # your extraction logic
    )
    
    # Run dbt transformations as a native Snowflake DBT PROJECT
    run_dbt = SnowflakePythonOperator(
    task_id='dbt_transform',
    python_callable=execute_dbt_project,
    op_kwargs={
    'sql_command': 'EXECUTE DBT PROJECT analytics_db.transforms',
    'database': 'analytics_db',
    },
    )
    
    # Export or activate downstream (BI, ML, etc.)
    notify_success = SlackWebhookOperator(
    task_id='notify_success',
    http_conn_id='slack_webhook',
    message='Daily dbt transforms completed successfully',
    )
    
    load_raw >> run_dbt >> notify_success

    The key line is `EXECUTE DBT PROJECT analytics_db.transforms`. That command runs inside Snowflake. Airflow waits for it to complete. Logs come back to Airflow. All in one place.

    Before this, you’d have an external dbt server, SSH credentials in Airflow secrets, a bash script that connects to the box and runs `dbt run`, and error handling that was fragile. Now it’s a direct REST API call to Snowflake.

    Setup: Snowflake side (one-time)

    Create the dbt project object in Snowflake. One time. Then Airflow orchestrates it:

    -- As SYSADMIN or higher
    USE ROLE SYSADMIN;
    
    -- Create a dedicated role and user for Airflow
    CREATE ROLE IF NOT EXISTS dbt_executor_role;
    CREATE USER IF NOT EXISTS airflow_svc_user
    DEFAULT_ROLE = dbt_executor_role
    DEFAULT_WAREHOUSE = dbt_transform_wh;
    
    -- Create a dedicated warehouse for dbt runs
    CREATE OR REPLACE WAREHOUSE dbt_transform_wh
    WITH WAREHOUSE_SIZE = 'MEDIUM'
    AUTO_SUSPEND = 120
    AUTO_RESUME = TRUE
    INITIALLY_SUSPENDED = TRUE;
    
    -- Grant permissions to Airflow's service account
    GRANT ALL ON WAREHOUSE dbt_transform_wh TO ROLE dbt_executor_role;
    GRANT USAGE ON DATABASE analytics_db TO ROLE dbt_executor_role;
    GRANT USAGE, CREATE TABLE, CREATE VIEW ON SCHEMA analytics_db.staging TO ROLE dbt_executor_role;
    GRANT USAGE, CREATE TABLE, CREATE VIEW ON SCHEMA analytics_db.marts TO ROLE dbt_executor_role;
    
    -- Grant the crucial permission: execute dbt projects in that schema
    GRANT EXECUTE DBT PROJECT ON SCHEMA analytics_db.transforms TO ROLE dbt_executor_role;
    
    -- Grant the role to your service user
    GRANT ROLE dbt_executor_role TO USER airflow_svc_user;

    Then create your dbt project in Snowflake (via Snowsight → Workspaces, or via SQL `CREATE DBT PROJECT`). That’s it on the Snowflake side.

    The three gotchas you’ll hit

    Gotcha 1: Forgetting schema-level EXECUTE permissions. The `GRANT EXECUTE DBT PROJECT ON SCHEMA` is the easy line to miss. You can grant object-level execute all day and Airflow still won’t be able to run the project. It’s schema-level that matters.

    Gotcha 2: dbt docs and artifacts not flowing back to Airflow. When dbt runs inside Snowflake, the manifest.json and dbt_project.yml artifacts stay inside Snowflake. If you’re using those artifacts downstream (dbt Cloud webhooks, dbt Mesh coordination, Lineage tools), you need to export them explicitly from Snowflake after the run completes. Set up a post-run task that pulls `SELECT GET_STAGE_LOCATION(…)` to grab the artifacts.

    Gotcha 3: Incremental models and first-run confusion. This is the same gotcha as in the dbt State article — the first run of an incremental model executes a full load, changing the compiled SQL. dbt State knows about this. Airflow doesn’t. Expect a full downstream rebuild on Run 2. Normal behavior. Just know it coming in.

    When to use job-level, when to use model-level

    Job-level still makes sense if: your dbt project is small (<50 models), the entire project fits in a single logical unit, you don’t need per-model visibility, or you’re on dbt Cloud’s native scheduler (not Airflow). Keep it simple.

    Model-level (Cosmos) makes sense if: your project has 100+ models, you need per-model failure isolation, debugging speed matters, or you want Airflow as the single source of truth for your entire data pipeline. Most production teams in 2026 are here.

    The hybrid: Some teams run both. Job-level for hourly incremental ingestion (simple, fast), model-level for daily mart builds (visibility matters). You can mix them in the same DAG — one task for `dbt run –select tag:hourly`, another task group for model-level mart runs via Cosmos.

    The one principle

    Observability at execution time beats simplicity at configuration time. Job-level is simpler to configure. Model-level is simpler to debug. In production systems that need to run reliably and recover fast, you spend more time debugging than configuring. Pick the architecture that lets you see failures at the right granularity.

    Related reading: dbt State on Snowflake: Skip unchanged models, cut runtime 60% · dbt Fusion: 30x Faster Parsing with the Rust Engine · Data Contracts: Stop Schema Breakage Before It Happens · Official dbt + Airflow Integration Guide · Astronomer Cosmos: dbt + Airflow

  • How to setup DBT state in Your Snowflake project (step-by-step Config Guide)

    How to setup DBT state in Your Snowflake project (step-by-step Config Guide)

    You read about dbt State. You understood the pitch — skip unchanged models, cut compute, stop paying to rebuild what didn’t change. Then you opened your project and stared at an empty dbt_project.yml wondering where to actually start.

    This is that guide. Not the concept. The implementation. Real configs, real gotchas, real Snowflake-specific decisions you’ll face inside the first hour of setup — covered here so you don’t have to learn them the hard way.

    If you’re still fuzzy on what dbt State is and whether the pricing makes sense for your team, start with the conceptual breakdown here. This guide assumes you’ve made the decision and want to ship it.

    TL;DR

    → dbt State is available in dbt Core v1.12+, Fusion, and the dbt platform. Enable via CLI, platform UI, or env var.

    → The most important config is lag_tolerance. Set tight in prod (4h), loose in dev (7d). Use Jinja so it’s one line, not two blocks.

    → On Snowflake, the “clone” reuse strategy uses Snowflake zero-copy cloning — it’s nearly instant and nearly free. This is why dbt State feels especially fast on Snowflake vs other warehouses.

    → Layer your lag_tolerance by folder: staging loose (data changes often), marts tight (business metrics need to be fresh).

    → Incremental model gotcha: the first time any incremental model runs, its compiled SQL changes (from full load to filtered load). dbt State treats this as a logic change and forces a downstream rebuild, even if lag_tolerance hasn’t elapsed. Expected behavior. Not a bug.

    → Track your skip rate using Snowflake’s QUERY_HISTORY view with the query_tag dbt sets automatically.

    → In CI: set DBT_ENGINE_MANAGE_STATE=true as an env var. Nothing else changes in your CI pipeline.

    → Target 40–60% skip rate in the first two weeks. Below 30% means your lag_tolerance is too tight. Above 80% means you’re missing rebuilds you actually need.

    Step 1: Enable dbt State

    There are three paths depending on what you’re running.

    dbt platform (Cloud): Go to Account settings → State → Enable dbt State. Then on each job: Settings → Edit → Execution settings → Enable dbt State → Save. That’s it. No YAML changes required to turn it on.

    dbt Core v1.12+ locally: Run dbt login in your terminal. It opens a browser window to authenticate with either your dbt platform account or the standalone app at app.state.dbt.com. Once authenticated, dbt State runs automatically on every dbt run or dbt build. You can override per-run with --manage-state or --no-manage-state.

    CI pipelines: Set DBT_ENGINE_MANAGE_STATE=true as an environment variable. Pass your dbt State credentials as DBT_STATE_TOKEN from your secrets manager. No other pipeline changes needed.

    Step 2: Configure lag_tolerance — the decision that matters most

    The default lag_tolerance is 45 minutes. Meaning: if upstream data changed less than 45 minutes ago, dbt State will skip the downstream model. If data changed more than 45 minutes ago and the model hasn’t rebuilt, it will rebuild.

    Forty-five minutes is a sensible global default, but in practice you want different tolerances for different environments and different parts of your DAG. Here’s the recommended starting config in dbt_project.yml:

    models:
    +state:
    lag_tolerance: "{{ '4h' if target.name == 'prod' else '7d' }}"

    That single Jinja expression does the right thing in both environments without duplicating config blocks. In production, models rebuild if upstream data is more than 4 hours stale. In development — where you’re iterating, not serving dashboards — models wait 7 days before triggering a rebuild. Your dev environment borrows production data through the clone strategy and doesn’t thrash on every upstream source change.

    Once you’ve run this for a week and have a feel for your actual skip rates, tune individual layers:

    models:

    +state:
    lag_tolerance: "{{ '4h' if target.name == 'prod' else '7d' }}"
    your_project:
    staging:
    +state:
    lag_tolerance: "{{ '1h' if target.name == 'prod' else '3d' }}"
    marts:
    +state:
    lag_tolerance: "{{ '2h' if target.name == 'prod' else '7d' }}"

    Staging models sit closer to raw sources that change frequently — tighter tolerance makes sense. Marts feed dashboards and executive reports — tighter tolerance there too, but not so tight that you’re rebuilding on every minor source refresh.

    Step 3: Set pre_clone for development environments

    pre_clone controls whether dbt State clones from production before running your model in a dev environment. This is where Snowflake’s zero-copy cloning makes dbt State genuinely fast — a clone of a 500GB fact table takes seconds and costs almost nothing in storage.

    models:
    +state:
    lag_tolerance: "{{ '4h' if target.name == 'prod' else '7d' }}"
    pre_clone: "{{ 'always' if target.name in ['dev', 'ci'] else 'if_missing' }}"

    The options are:

    always — Clone from prod every time before running the model, even if a version already exists in your schema. Use this in dev when you want a fresh production baseline on every run.

    if_missing — Default. Clone from prod only if the table doesn’t exist in your schema yet. After the first clone, subsequent runs work on your existing version.

    never — Don’t clone. Build from scratch if the model needs to run. Rarely what you want.

    For CI jobs, always makes sense — each CI run should start from the current production state. For personal dev schemas, if_missing is usually fine after your initial setup.

    Step 4: Snowflake-specific config that pairs well with dbt State

    Layer your warehouse sizing, materialization, and lag_tolerance together. dbt State skip rate is highest on large mart tables where Snowflake cloning is fastest.

    A few Snowflake-specific configs pair directly with dbt State behavior.

    query_tag for tracking. dbt sets a query tag automatically on Snowflake sessions. Use it to track which models are being built vs skipped:

    # dbt_project.yml
    models:
    +query_tag: "dbt_{{ target.name }}_{{ model.name }}"

    Then query Snowflake’s QUERY_HISTORY to see your actual skip rate and time saved:

    SELECT
    query_tag,
    COUNT(*) AS query_count,
    SUM(total_elapsed_time) / 1000 AS total_seconds,
    SUM(credits_used_cloud_services) AS credits_used
    FROM snowflake.account_usage.query_history
    WHERE query_tag LIKE 'dbt_%'
    AND start_time >= DATEADD(day, -7, CURRENT_TIMESTAMP)
    GROUP BY 1
    ORDER BY credits_used DESC;

    This gives you a concrete before/after when you want to demonstrate ROI.

    transient vs permanent tables. By default, all dbt-created Snowflake tables are transient (no Fail-safe, 1-day time travel). Transient tables are slightly cheaper on storage. For models that dbt State frequently clones — large mart tables — transient is fine because you can always re-clone from production. For models you want full Snowflake time travel on, set transient: false explicitly:

    models:
    your_project:
    marts:
    +transient: false # Keep full time travel on business-critical marts
    staging:
    +transient: true # Transient fine — replaceable by clone

    warehouse sizing per layer. dbt State reduces how many models actually run — which means you can tune warehouse sizes down without hurting throughput. If 40% of your models are being skipped, your MEDIUM warehouse is running at 60% utilization anyway. Consider dropping staging to XSMALL and only using MEDIUM for mart builds:

    models:
    your_project:
    staging:
    +snowflake_warehouse: XSMALL
    intermediate:
    +snowflake_warehouse: SMALL
    marts:
    +snowflake_warehouse: MEDIUM

    Step 5: The incremental model gotcha you will hit

    The incremental model first-run gotcha: compiled SQL changes between run 1 and run 2. dbt State sees this as a logic change. Expect a full downstream rebuild on run 2. After that, behavior stabilizes.

    This one catches most teams in the first week. Here’s what happens.

    The first time an incremental model runs, dbt executes a full load — no WHERE clause, because there’s no existing table to filter against. The compiled SQL looks like:

    SELECT id, amount FROM raw_orders

    On the second run, is_incremental() becomes true. The compiled SQL now looks like:

    SELECT id, amount FROM raw_orders
    WHERE id > (SELECT MAX(id) FROM fct_orders)

    dbt State sees this as a query logic change on fct_orders. It then marks every downstream model that depends on fct_orders as needing a rebuild — even if their own lag_tolerance hasn’t elapsed and their own code hasn’t changed.

    This is not a bug. It’s correct behavior — the incremental model’s SQL did change, semantically. But it means: the first two runs after enabling dbt State on an incremental model will look worse than steady-state. Run 1 is a full build. Run 2 triggers a full downstream rebuild. Run 3 onwards is where your skip rate actually stabilizes and starts saving you money.

    If you’re evaluating dbt State’s ROI, don’t measure it on day 1 or day 2. Give it a week of runs.

    Step 6: defer_to_target and environment setup

    By default, dbt State defers to your production environment. If your production environment isn’t literally named “prod” in your dbt platform setup, you’ll need to be explicit:

    # dbt_project.yml
    models:
    +state:
    lag_tolerance: "{{ '4h' if target.name == 'prod' else '7d' }}"
    defer_to_target: production # name of your prod environment in the platform

    For dbt Core users managing their own targets, this is set in profiles.yml:

    # profiles.yml
    my_project:
    outputs:
    prod:
    type: snowflake
    defer_to_target: production
    # ... rest of connection config

    In practice: make sure the environment you’re deferring to is actually up to date. If production last ran 48 hours ago and your dev environment is trying to clone from it, you’re cloning stale data. The lag_tolerance in dev being set to 7d means you’re fine with data that’s up to 7 days old in dev — that’s usually acceptable. Just be aware of the tradeoff.

    What good skip rates look like on Snowflake

    In the first two weeks after enabling dbt State on a mature Snowflake project, here’s what typical skip rates look like by layer:

    Staging models: 20–40% skip rate. These sit close to raw sources that change frequently. You won’t skip many — and that’s expected.

    Intermediate models: 40–65% skip rate. These transform staging output into business-ready structures. When staging is unchanged, intermediate skips cleanly.

    Mart models: 55–80% skip rate. These are the expensive ones — large aggregations, heavy joins, wide tables. This is where dbt State pays for itself. A skipped mart model on a MEDIUM Snowflake warehouse is 30–60 seconds of compute you’re not paying for, every run.

    If your overall skip rate is below 30%, your lag_tolerance is probably too tight — data is changing within the tolerance window and everything is rebuilding. Loosen it and see what happens. If your skip rate is above 80% in production, double-check that you’re not accidentally skipping models that should be rebuilding. Query QUERY_HISTORY and verify the freshness of your mart tables against your source freshness.

    Three things that will trip you up

    Volatile SQL functions force a rebuild. If any model uses CURRENT_TIMESTAMP()RANDOM(), or UUID_STRING() in its SQL, dbt State treats the query as non-deterministic and won’t skip it — ever. These functions mean the compiled SQL could produce different results on every run, so skipping isn’t safe. Audit your models for volatile functions if your skip rate is suspiciously low.

    LAST_ALTERED in Snowflake is misleading. Snowflake updates the LAST_ALTERED timestamp on a table whenever any metadata operation occurs — not just when data changes. If you’re using LAST_ALTERED in any custom freshness logic, it will report tables as “changed” more often than they actually are, leading to unnecessary rebuilds. dbt State doesn’t use LAST_ALTERED internally (it tracks actual data freshness via source freshness checks), but if you have custom macros that do, fix them.

    Dynamic tables and dbt State don’t fully overlap yet. Snowflake’s dynamic tables refresh automatically based on target_lag. If you’re using the dynamic_table materialization in dbt, dbt State’s lag_tolerance config is separate from Snowflake’s target_lag. They’re two different systems tracking two different things. Don’t assume they’re in sync — they’re not. Manage them explicitly.

    The full dbt_project.yml starting point

    Here’s a production-ready starting config for a typical Snowflake dbt project with dbt State enabled:

    name: 'your_project'
    version: '1.0.0'
    profile: 'your_project'
    
    models:
    +query_tag: "dbt_{{ target.name }}"
    +state:
    lag_tolerance: "{{ '4h' if target.name == 'prod' else '7d' }}"
    pre_clone: "{{ 'always' if target.name in ['dev', 'ci'] else 'if_missing' }}"
    
    your_project:
    staging:
    +materialized: view
    +snowflake_warehouse: XSMALL
    +state:
    lag_tolerance: "{{ '1h' if target.name == 'prod' else '3d' }}"
    
    intermediate:
    +materialized: table
    +transient: true
    +snowflake_warehouse: SMALL
    
    marts:
    +materialized: table
    +transient: false
    +snowflake_warehouse: MEDIUM
    +state:
    lag_tolerance: "{{ '2h' if target.name == 'prod' else '7d' }}"

    This gives you environment-aware lag tolerances, warehouse sizing tuned per layer, zero-copy clone behavior in dev and CI, and full Snowflake time travel on your business-critical mart tables.

    One principle

    dbt State doesn’t change what you build — it changes what you prove you don’t need to rebuild. The configs above aren’t magic. They’re your team’s explicit statement about how fresh each layer of your project needs to be, enforced automatically on every run. Get the lag tolerances right and the skip rate takes care of itself.

    Related reading: dbt State: The concept, the cost math, and when it pays off · Official dbt State setup docs · lag_tolerance config reference · dbt Fusion: 30x Faster Parsing · Snowflake Query Execution: What Really Happens